How to Make a Floral Ice Bucket. {Video!}
OH HI!
So we’re doing something a leeeeettle different for thirsty Thursday today, but I promise that it does include a drink. Err, something to put your drink IN. Which is almost as good.
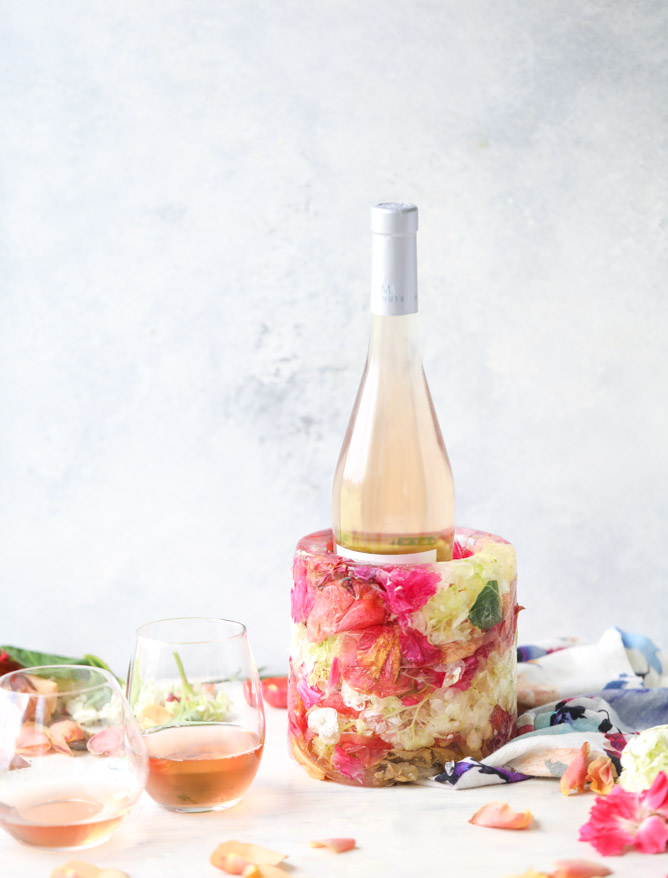
Yes yes! This floral ice bucket was such a hit last summer and I’ve had tons of requests to share, so here’s how we are doing it. It’s super fun and pretty and people think that you are wildly talented because you can mix flowers and water. To create ice! To hold your wine!
I know that technically one of these ice molds isn’t required, but it makes the process about a million times easier. SO much easier, trust me. I tried making one of these before getting a mold and it was near impossible to get out and also super difficult to fit in my freezer to freeze.
So! Ice mold it is. This one is from crate and barrel (full disclosure, they sent me one of these last summer because I do a lot of freelance work for them, but I purchased a second on my own because I wanted to make two molds for a party!) and it works like a charm.
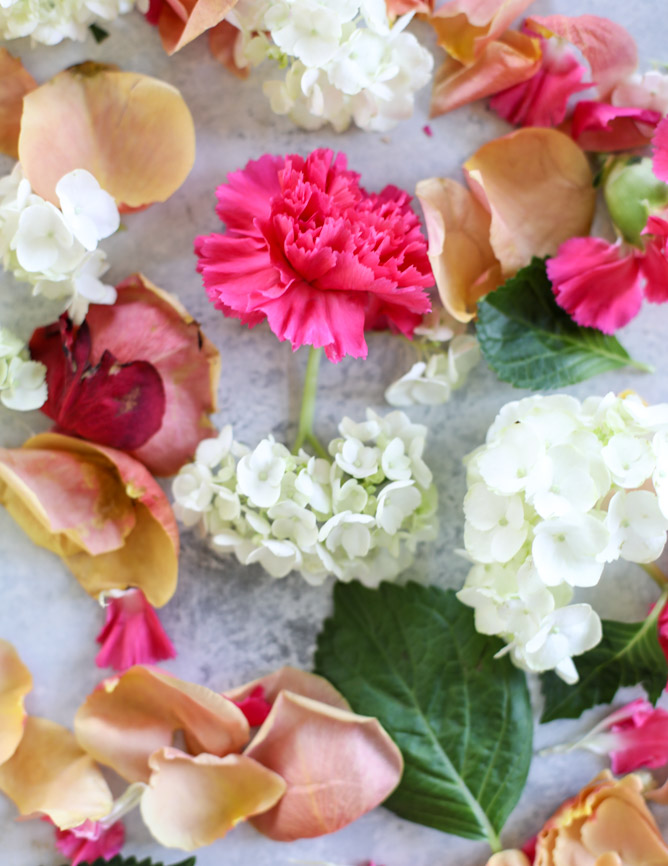
When it comes to the flowers, I can’t bear to buy gorgeous fresh flowers JUST for this purpose. So I usually buy them a few days (or even a week) in advance and then use up the flowers once they are on their last leg. This makes me feel better about life in general and like I didn’t buy $20 worth of flowers to cover in water and make an ice cube. You know.
The flowers to use? Whatever you want! Pick whatever flowers you love and whatever colors you love. I pull off some of the petals when necessary and pull the flower from the stems. Sometimes I incorporate the bigger, heartier green leaves too because I like the color. Fill up the mold and fill it with water. The WORST part is waiting the full 24 hours for this big thing to freeze, so yes I do suggest planning this out ahead of time.
In fact, if you go right this season and buy flowers you can have this done for the weekend! So you can really shout yes way rosé from the rooftops. FUN.

How to Make a Floral Ice Bucket
Ingredients
- a cooler ice cube mold like this one
- a bunch of fresh flowers
Instructions
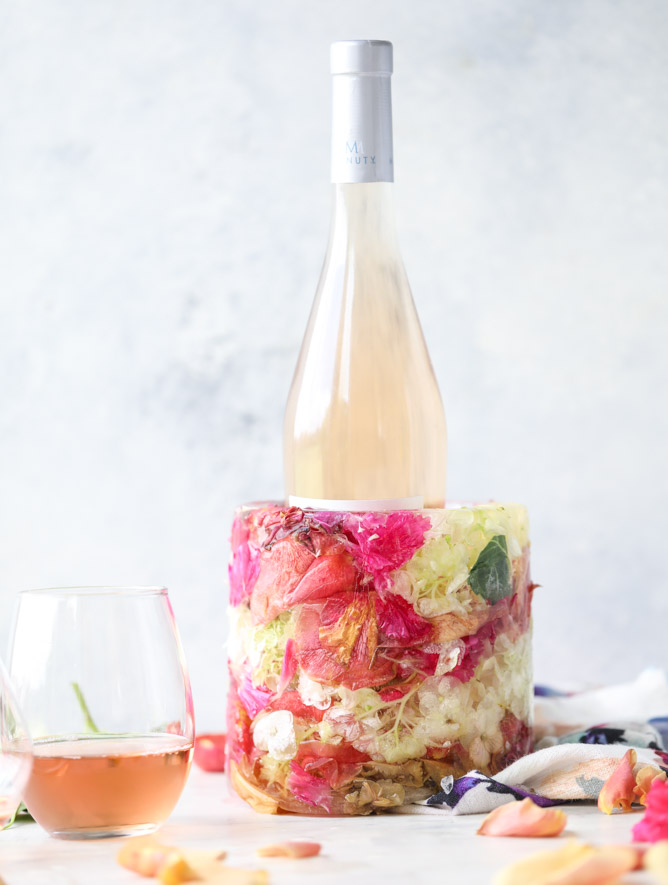
- Most molds will have their specific directions, so you can easily follow them. But I like to cut the flowers from the stems and place them into the molds in alternating colors. You can also use citrus or other fruits! I then pour in hot water (so it will hopefully freeze as clear as possible) and freeze overnight. Right before using, run under warm water, remove from the mold and stick your wine inside! So pretty.
- Note: the mold I use comes with a container to hold it in – on top of using that, you can also set this on a platter of ice. It melts much slower than you’d think, but I would still only use it indoors!
Did you make this recipe?
Be sure to follow @howsweeteats on instagram and tag #howsweeteats. You can also post a photo of your recipe to our facebook page.
I appreciate you so much!
Of course if you in my situation, you can fill it with some sparkling blood orange soda. Almost as good.

25 Comments on “How to Make a Floral Ice Bucket. {Video!}”
This looks incredible!! Perfect for a garden party or a summer wedding! Thanks for the video tutorial! :)
thanks dora!
Pingback: How to Make a Floral Ice Bucket. {Video!} – Fruitide
This is so beautiful! I want to make one!
thanks jamie!
I had no idea those molds existed. Off to buy one right now!
you’ve got to try it!
In the words of chandler bing, could this BE any prettier?!
Eeeek this is incredible! Does it stay frozen for a pretty long time?
it actually does! much longer than i anticipated – but i would keep it indoors. also, you can place it on a platter of ice to help keep it frozen even longer!
oooh, so pretty, and I bet very adaptable for different seasons! I’m picturing pine sprigs & cranberries at Christmastime… dreamy!
yes yes! love that idea!
Doesn’t this just melt all over the table? Am I missing something here?
I see now on their website that the kit includes a metal canister to put your ice bucket in. It does lessen the prettiness of it, but only slightly.
yes it does!! i didn’t use it in the pic because it covers about half of the mold, but it def helps. also, placing the mold on a platter of ice keeps it from melting quickly too. it melts a lot slower than you’d think!
Well, isn’t that gorgeous! I am always too intimidated by craft projects, but this I think I could handle (rip apart flowers… yeah, I can do that).
thanks brian!
OMG, what a beauty! This DIY idea is so clever and 100% a stunner. I can already picture using Autumn leaves for mine. Thanks a lot for this!
thanks!
beautiful!
thanks jane!
I never knew!! I love it — I learn so much from my blogger friends. Can’t wait to try it!! Do you use distilled water to get that clear look??
i actually just use hot water, but yes, distilled water would give it a super clear look!
Flippin’ gorgeous! And so clever! I LOVE it!
Pingback: link love - Rachael's Foodie Life