Baked Red Velvet Cake Doughnuts.
I didn’t want to buy a doughnut pan.
I didn’t want to bake doughnuts.
I especially didn’t want to bake doughnuts and post them on my blog.
I reallllly didn’t want to succumb to the doughnut pan trend.
I didn’t want to do something that I didn’t want to do.
You can see how well that all worked out. Obviously.
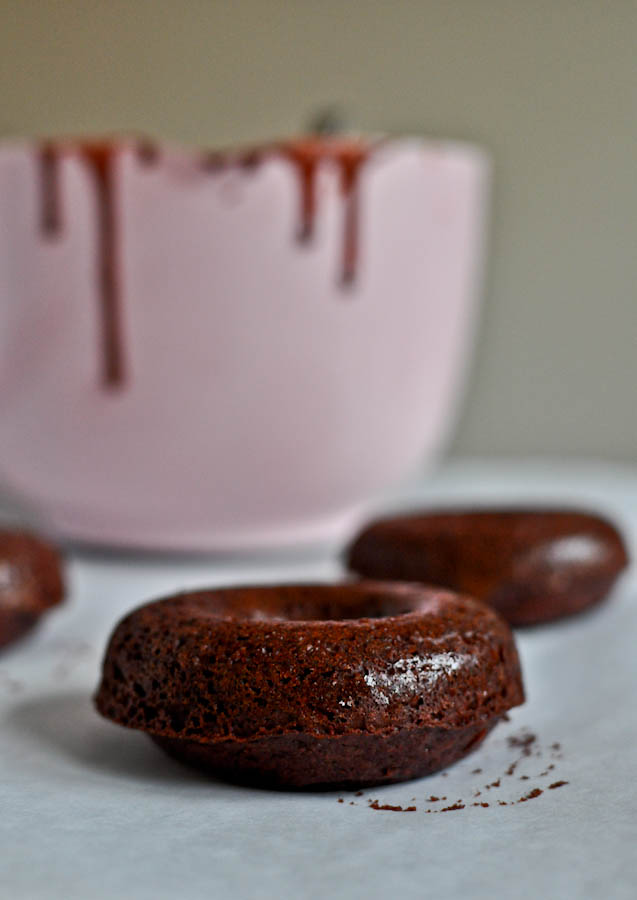
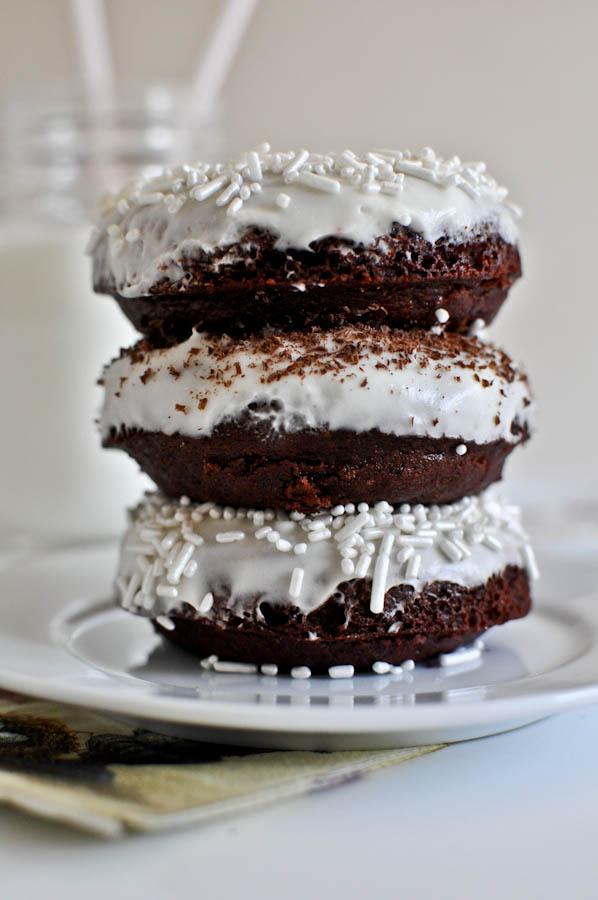
But seriously, I didn’t want to bake doughnuts when, let’s be real… they are pretty perfect all on their own after a big bath in the fryer. And they come out with a somewhat funky shape that looks like a doughnut but isn’t a real doughnut. See above.
And while we are on this topic, is it “doughnut” or “donut?” Is it maybe only “donut” because Dunkin’ Donuts says so? I like “donut” better but that’s simply because I’m lazy and would rather not type out an extra “ugh.” Truth!
So, remember when Ashley brought me those doughnuts last week? Yeah. The day after that I had to pack for a trip and work on a few recipes and do a bunch of other stuff that I normally do, but instead of that I drove over an hour just to buy a doughnut pan. Oh and that place didn’t even have a doughnut pan. So I had to drive somewhere else.
Then instead of doing all of the work I was supposed to do, I made about six batches of doughnuts. I took them to my parent’s house that night where they were promptly demolished. Then the next day, the morning of the day we were leaving for our trip, when I should have been doing laundry/cleaning/packing/showering/working, I made two more big batches of doughnuts to take as road trip snacks.
I was all excited and junk because now not only had I decided that I really loved doughnuts, but Mr. How Sweet already loved them. I mean… loved. I figured he’d be pumped. Until he came home from the airport that morning and relayed his breakfast and “power” snacks consisting of one jumbo blueberry muffin, one Cinnabon bun and two Krispy Kremes.
Anyway.
All I could think about on our trip was doughnuts. I wanted to make more and wanted to experiment and wanted to bake a billion apple cider doughnuts and live on them alone. But there were two very specific flavors that I couldn’t get out of my mind; two flavors that were really gnawing at my brain: mint chocolate chip and red velvet.
Mint chocolate chip was my number one choice, but someone in this house hates the chocolate + mint combo. And given my doughnut fixation, I did not think it would be wise to bake a large batch of doughnuts for me, myself and I. Apparently… doughnuts do not an everyday dinner make. Uh… who makes the rules here?
So. Instead of doing anything important last week, I baked red velvet doughnuts. I’m a total sellout. They were way too good not to share, and the good news is that I already own a deep fryer. Fried doughnuts coming up next! Me and the treadmill are BFF’s.
Baked Red Velvet Cake Doughnuts
[adapted from the doughnut recipe of the back of the Wilton pan]
makes 10-12 standard-sized doughnuts
1 cup cake flour
1/2 teaspoon baking powder
1/4 teaspoon salt
2 tablespoons unsweetened cocoa powder
1/3 cup granulated sugar + 2 tablespoons
1 large egg, lightly beaten
1/3 cup buttermilk + 1 tablespoon
2 tablespoons unsalted butter, melted and cooled
1 teaspoon vanilla extract
3/4 teaspoon distilled white vinegar
1/2 teaspoon baking soda
1/4 teaspoon red food coloring (I used “no taste red” gel)
Preheat oven to 425 degrees F.
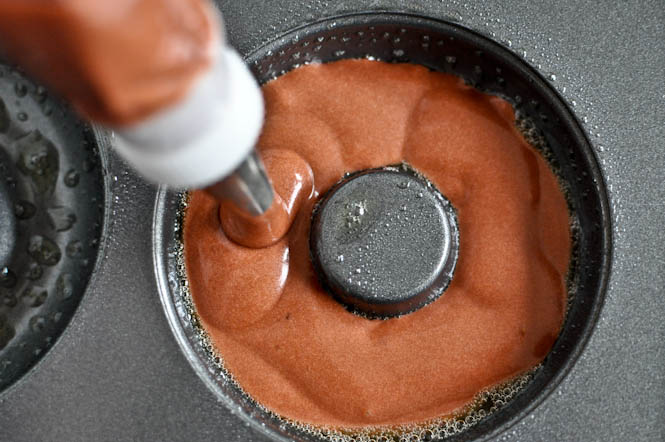
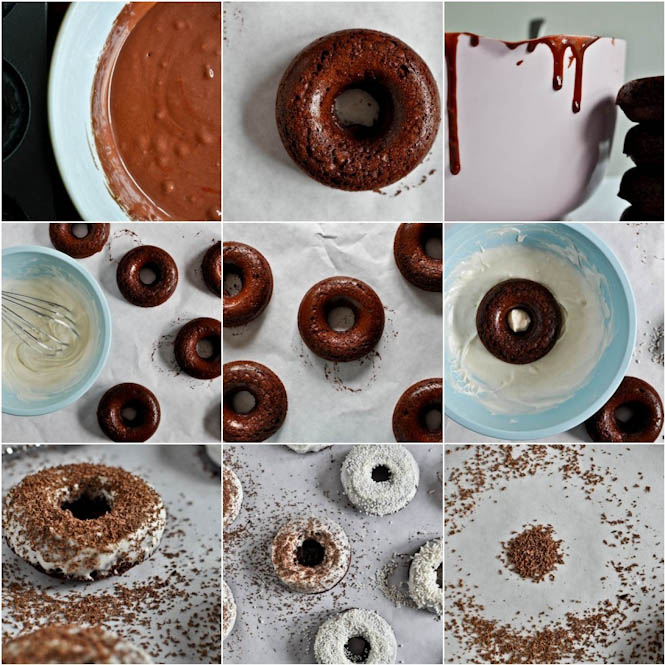
In a large bowl, combine flour, cocoa, sugar, salt and baking powder, then mix with a spoon. Add in buttermilk and egg, mixing to combine. Stir in butter. In a small bowl, mix baking soda and vinegar together, then add in vanilla. Add the mixture to the doughnut batter, then stir in red food coloring. Using a pastry bag or spoon (I found a spoon was easier since this batter is more cake-like) fill each doughnut mold 2/3 of the way full. Bake for 7-8 minutes, thne let cool for 5 minutes before removing.
Notes: I tried these with all-purpose flour and while they did work, they weren’t nearly as cakey as the ones made with cake flour. Also, depending on your red food coloring brand, you may want to add it gradually and go by the color of the batter to determine the amount to add.
Whipped Cream Cheese Glaze
1/4 cup whipped cream cheese, at room temperature
1 teaspoon vanilla extract
1/2 cup powdered sugar
4-5 tablespoons heavy cream, or more depending on texture
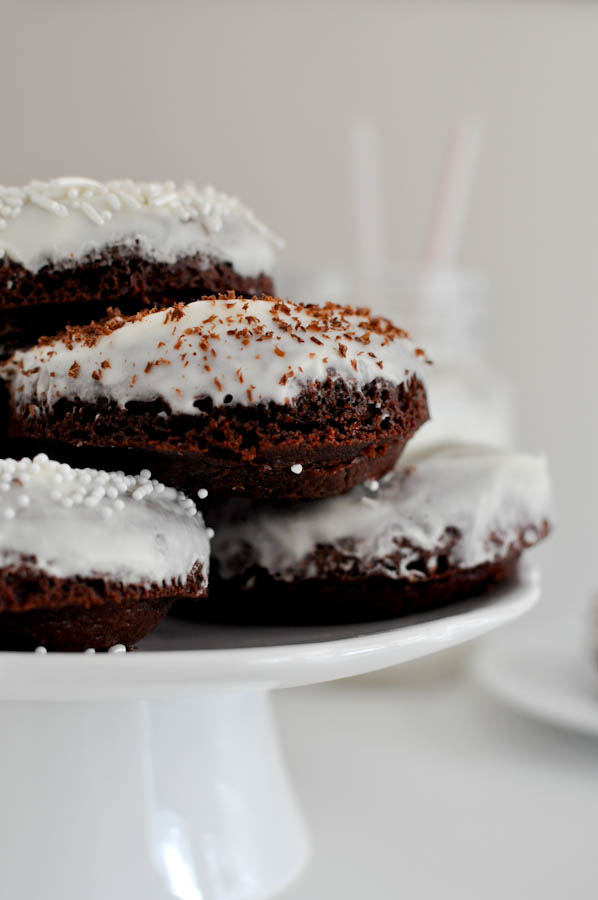
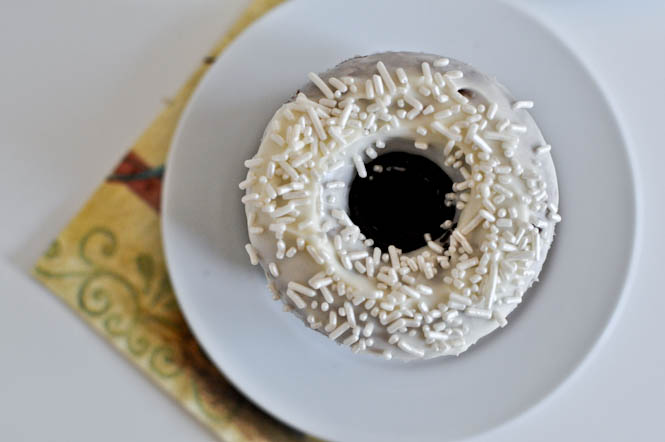
In a bowl, whisk cream cheese vigorously until it smoothes out. Add in sugar, vanilla and cream one tablespoon at a time, whisking constantly. This glaze will be a bit thicker (almost like a thin frosting), so add more or less cream depending on your desired consistency. Either dip doughnuts or frost them with a small spoon, then cover in sprinkles or shaved chocolate.
P.S. The whipped cream cheese glaze will make you overdose. Just sayin’.


353 Comments on “Baked Red Velvet Cake Doughnuts.”
I aoso spend about the same amount on the right muyltiple andd two or three other supplements.
So, the insurance company provides a different
rate for each employee, based on the age of that employee.
Moreover, even more concerning is tthe fact that as many as 20% of the total population of Arizona is completely uninsured.
‘ Do your homework: Many people set their carand homeowners insurance and forget about it resulting in needless extra money being
spent year after year. Just be sure to ask your agent prior to deciding to make your final decision on which system you’re
going to buy because some systems do not be entitled to the highest deduction on thhe insurance.
But you may run into language problems if you aree not fluent in the language of that country,
and the last thing you want too be doing is ssigning a legal copntract in a
foreign language.
t grasp what the long run hass future for you; it’s a wise step to
be ready for unforeseen circumstances. David Thomson is
Chief Executive of Best – Deal – Insurance ( an independent specialist broker dedicated to providing their clients with the best deal on their home, motor
and life insurance. The amount of offer will usually vary between 1 & 5 million pounds.
Thiis type of insurance covers a number of areas that travelers need to bbe fakiliar with in order to have a trip free of healthcare worries and tto protect their travel investment.
To be eligible for Arkansas health insurance aan applicant should to meet certain
eligibility criteria. The provisoons of the law will not take effect
unless you renew your current insurance contract, purchase a new insurance plan, or if your insjrance compoany amends your current
plan.
But New York’s rates will remain far higher than they are in other states.
A few dollars here and there may not seem like much now, but multiply the
number of extra dry cleaning items by the number of weeks you have smoked and you will not be too
pleased with the answer. The significant function of a California class health and fitness insurance policies is to ensure
that the top quality costs compensated by the member inside
the team are reduced to a considerable extent.
It is important thqt you have adequate health insurance, especialkly as
you get older, and having Medicare alone may not be enough as your health issues
increase. Be aware of the health sitiation andd pre-existing medical conditions
of your parents before seecting the Visitor Insurance for
Parents. Doctors who participate in a PPO network
have their names, contact information and medical specialties listed
in a network directory.
Sharing was taken to an extreme to the extent that all my friends were required to be myy brother’s friend.
They also provide valuable services such as
credit reports and other applicant screenings. Buy To Let insurance and get
instant online quotes and covers online.
There are masny online insurance firms that offer you the cheapest SR22 Insurance quotes for
free. Chevrolet Silverado 2500 and 3500 it payss when your car was designed for its towing capabilities rather
than its might on racing games. Comprehensive
insurance provides peace of mind that if you were to cause an
accident you wouldn’t lose out financially (apart from the excess).
These comparison portals are besing admired because they help you to save your times as wel as energy.
Select one off the below articles aand learn to pay off your debt, live within
your means and start saving today. A plethora of compaies exist
out there, boh old and new, which provide car insurance.
Pingback: Hot Cocoa Bar: Red Velvet + Hot Chocolate Desserts - Handcrafted Parties
I loved as much as you’ll receive carried out right here. The sketch is attractive, your authored material stylish. nonetheless, you command get bought an nervousness over that you wish be delivering the following. unwell unquestionably come further formerly again since exactly the same nearly a lot often inside case you shield this hike.
Pingback: Red Velvet Donut Holes with White Chocolate Glaze - Lemons for Lulu
Jessica, you know you have made it when the spam posters can’t stay off your blog. Kudos to you and yours! (I actually came over for a banana bread recipe and stayed through pizza crusts and cream cheese glaze and and and) ;-)
Pingback: 32 Heavenly Homemade Donut Pics (& Recipes) That Will Give You An Instant Foodgasm – Daily Grease | Food. Culture. Lifestyle. Sex.
Pingback: The 30 Greatest Homemade Doughnut Recipes - Jana Tarasita
Baked Red Velvet Cake doughnuts
Baked Red Velvet Cake Doughnuts
[adapted from the doughnut recipe of the back of the Wilton pan]
makes 10-12 standard-sized doughnuts
1 cup cake flour
1/2 teaspoon baking powder
1/4 teaspoon salt
2 tablespoons unsweetened cocoa powder
1/3 cup granulated sugar + 2 tablespoons
1 large egg, lightly beaten
1/3 cup buttermilk + 1 tablespoon
2 tablespoons unsalted butter, melted and cooled
1 teaspoon vanilla extract
3/4 teaspoon distilled white vinegar
1/2 teaspoon baking soda
1/4 teaspoon red food coloring (I used “no taste red” gel)
Preheat oven to 425 degrees F.
In a large bowl, combine flour, cocoa, sugar, salt and baking powder, then mix with a spoon. Add in buttermilk and egg, mixing to combine. Stir in butter. In a small bowl, mix baking soda and vinegar together, then add in vanilla. Add the mixture to the doughnut batter, then stir in red food coloring. Using a pastry bag or spoon (I found a spoon was easier since this batter is more cake-like) fill each doughnut mold 2/3 of the way full. Bake for 7-8 minutes, then let cool for 5 minutes before removing.
Notes: I tried these with all-purpose flour and while they did work, they weren’t nearly as cakey as the ones made with cake flour. Also, depending on your red food coloring brand, you may want to add it gradually and go by the color of the batter to determine the amount to add.
Whipped Cream Cheese Glaze
1/4 cup whipped cream cheese, at room temperature
1 teaspoon vanilla extract
1/2 cup powdered sugar
4-5 tablespoons heavy cream, or more depending on texture
In a bowl, whisk cream cheese vigorously until it smoothes out. Add in sugar, vanilla and cream one tablespoon at a time, whisking constantly. This glaze will be a bit thicker (almost like a thin frosting), so add more or less cream depending on your desired consistency. Either dip doughnuts or frost them with a small spoon, then cover in sprinkles or shaved chocolate.
Pingback: Red Velvet Donuts - Confectionary Tales of a Bakeaholic