
Pumpkin Pierogies with Brown Butter and Crispy Sage.
These pumpkin pierogies are the perfect bite of fall.
If there ever was a flavor of pierogi that I desired? Pumpkin is it. I mean, I live in Pittsburgh so pierogies are totally a THING here. This may scare pierogi purists away but we’re going on a little fall flavor adventure today!
And it has brown butter. Of course.
HOW COULD IT NOT?!
P.S. head over to instagram to see how I make these step-by-step.
Earlier this year I made sweet potato pierogi and they remain one of the most delicious things I made in 2020! Now, that was before the world collapsed and what not, but even still, they hold up. They are major comfort food, so pillowy and buttery and nourishing. I wish we could make them every single week!
I’ve wanted to make pumpkin pierogies ever since. But I was torn! Do I put pumpkin in the dough or the filling? Or both?
There has been pumpkin gnocchi, which sold me on the dough. But I’ve also made pumpkin ravioli at home, so I thought it should go in the filling.
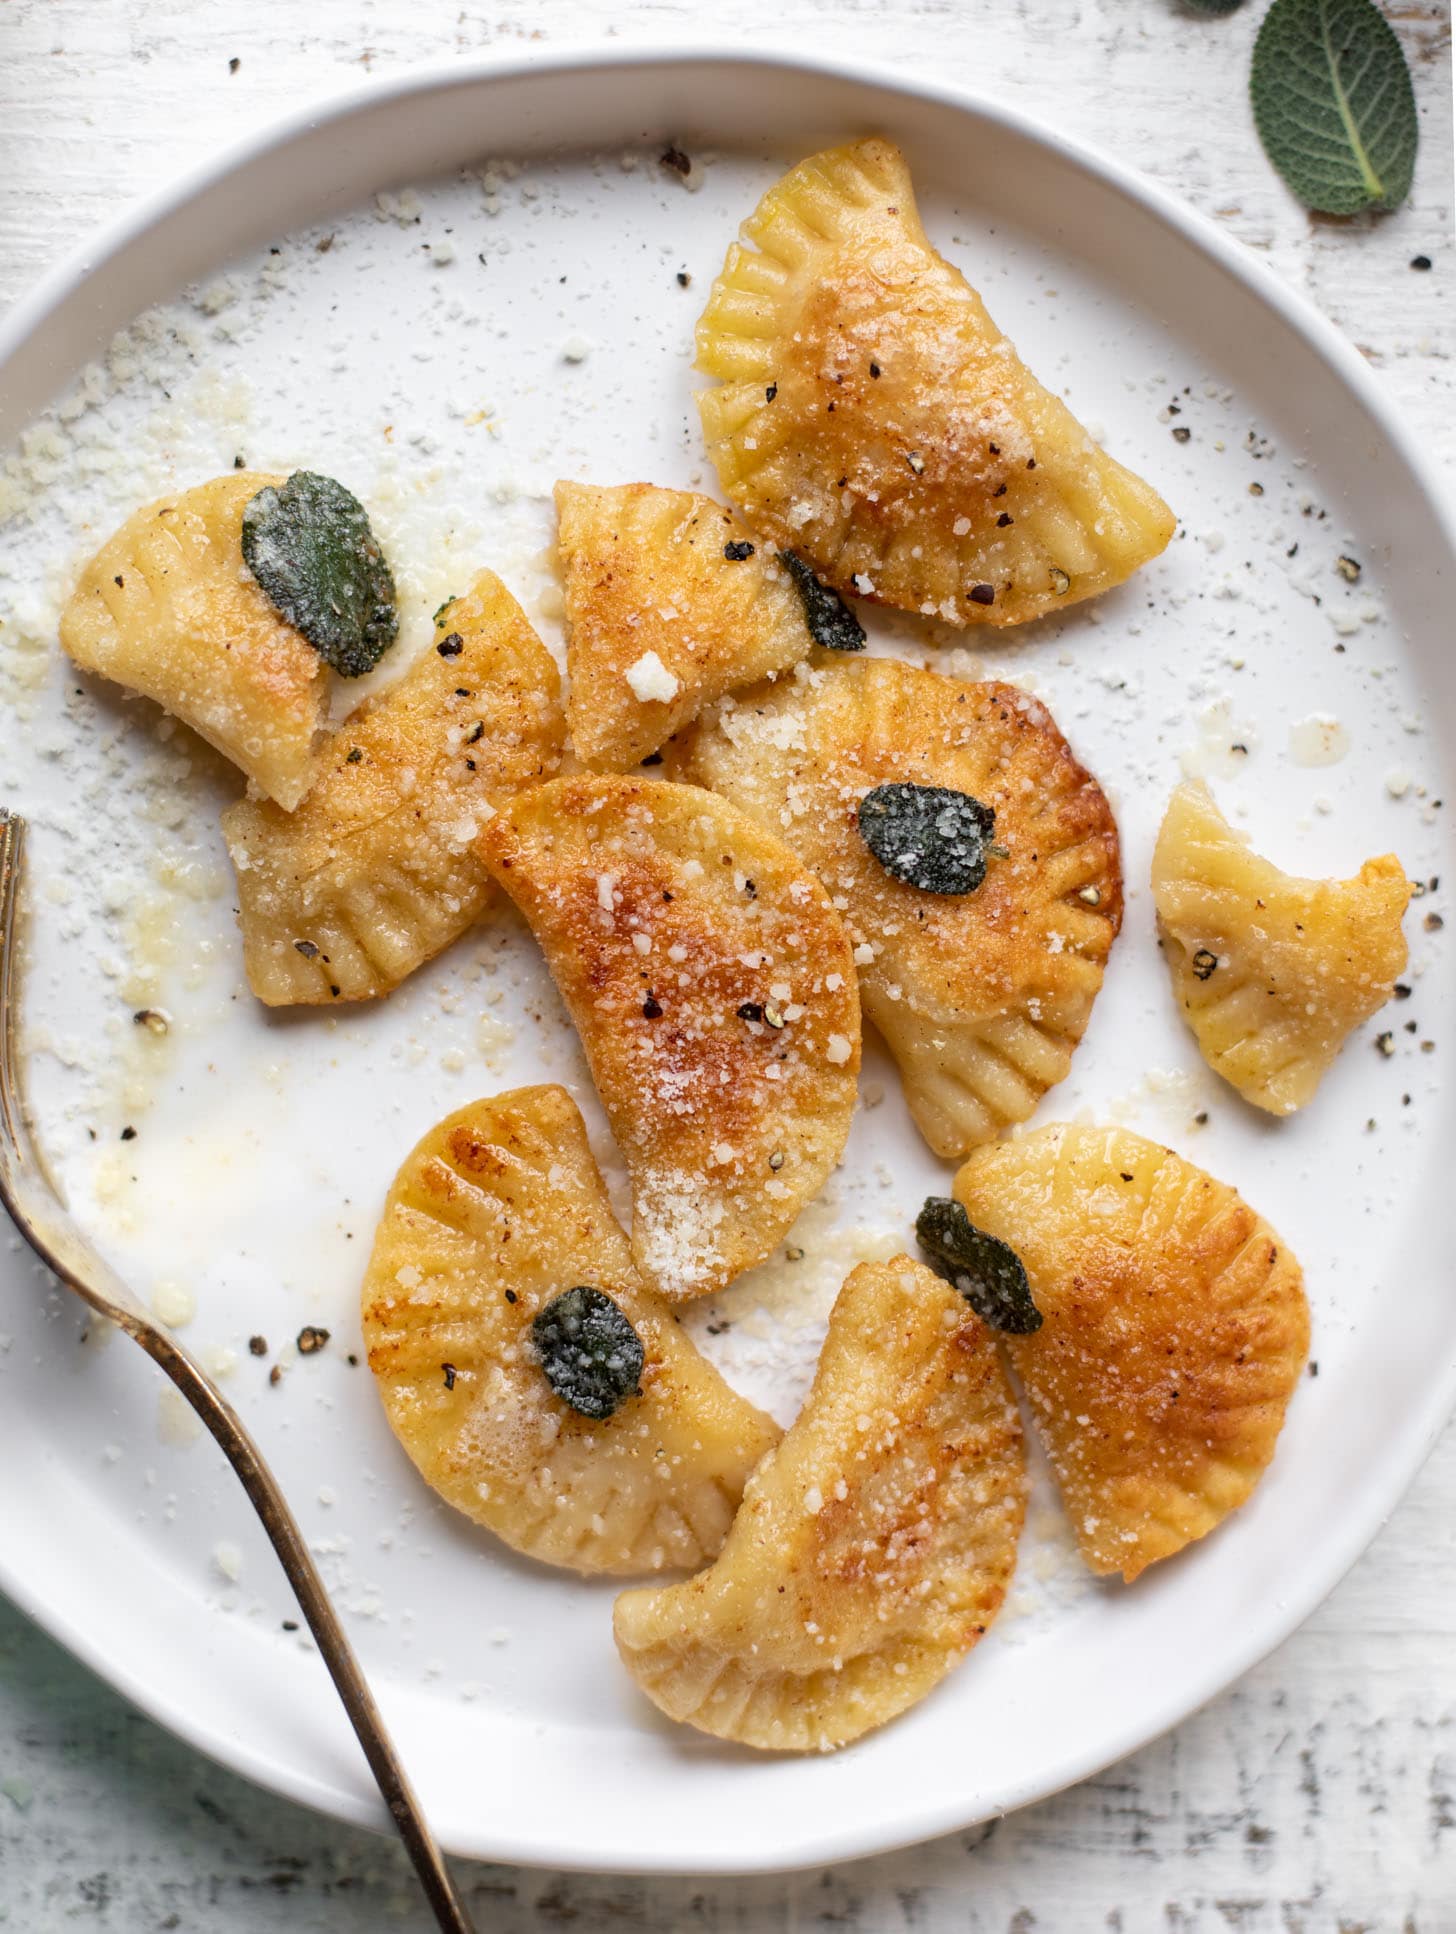
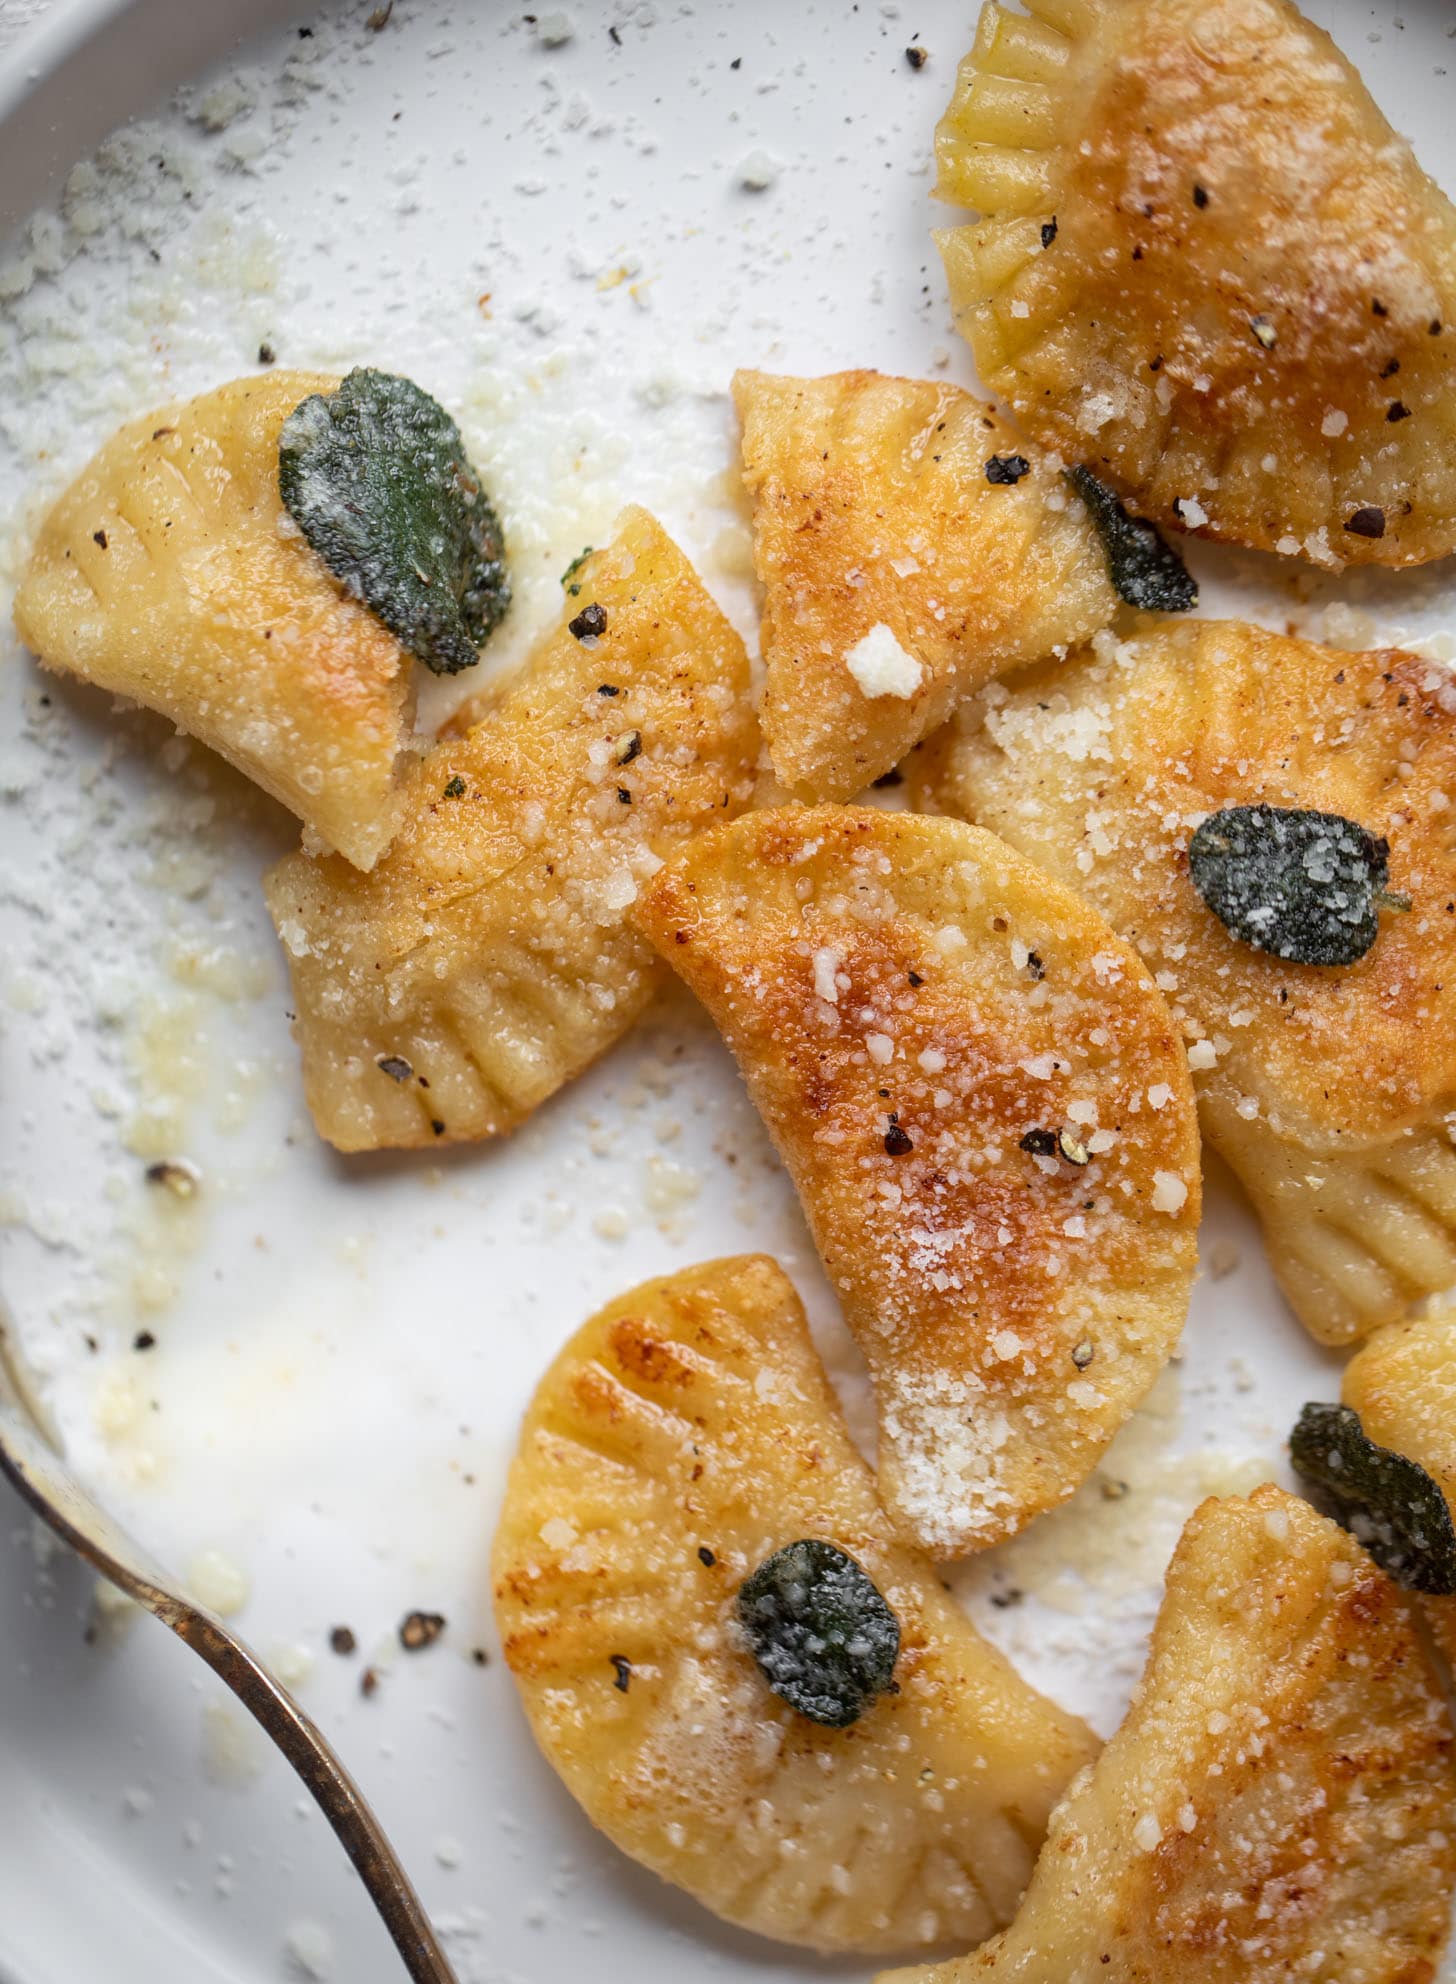
Ultimately after a few tests, I went with regular dough (it’s so tender and soft) with a pumpkin filling. The filling is made of ricotta, pumpkin and parmesan with a shower of nutmeg and oh my word – is it incredible.
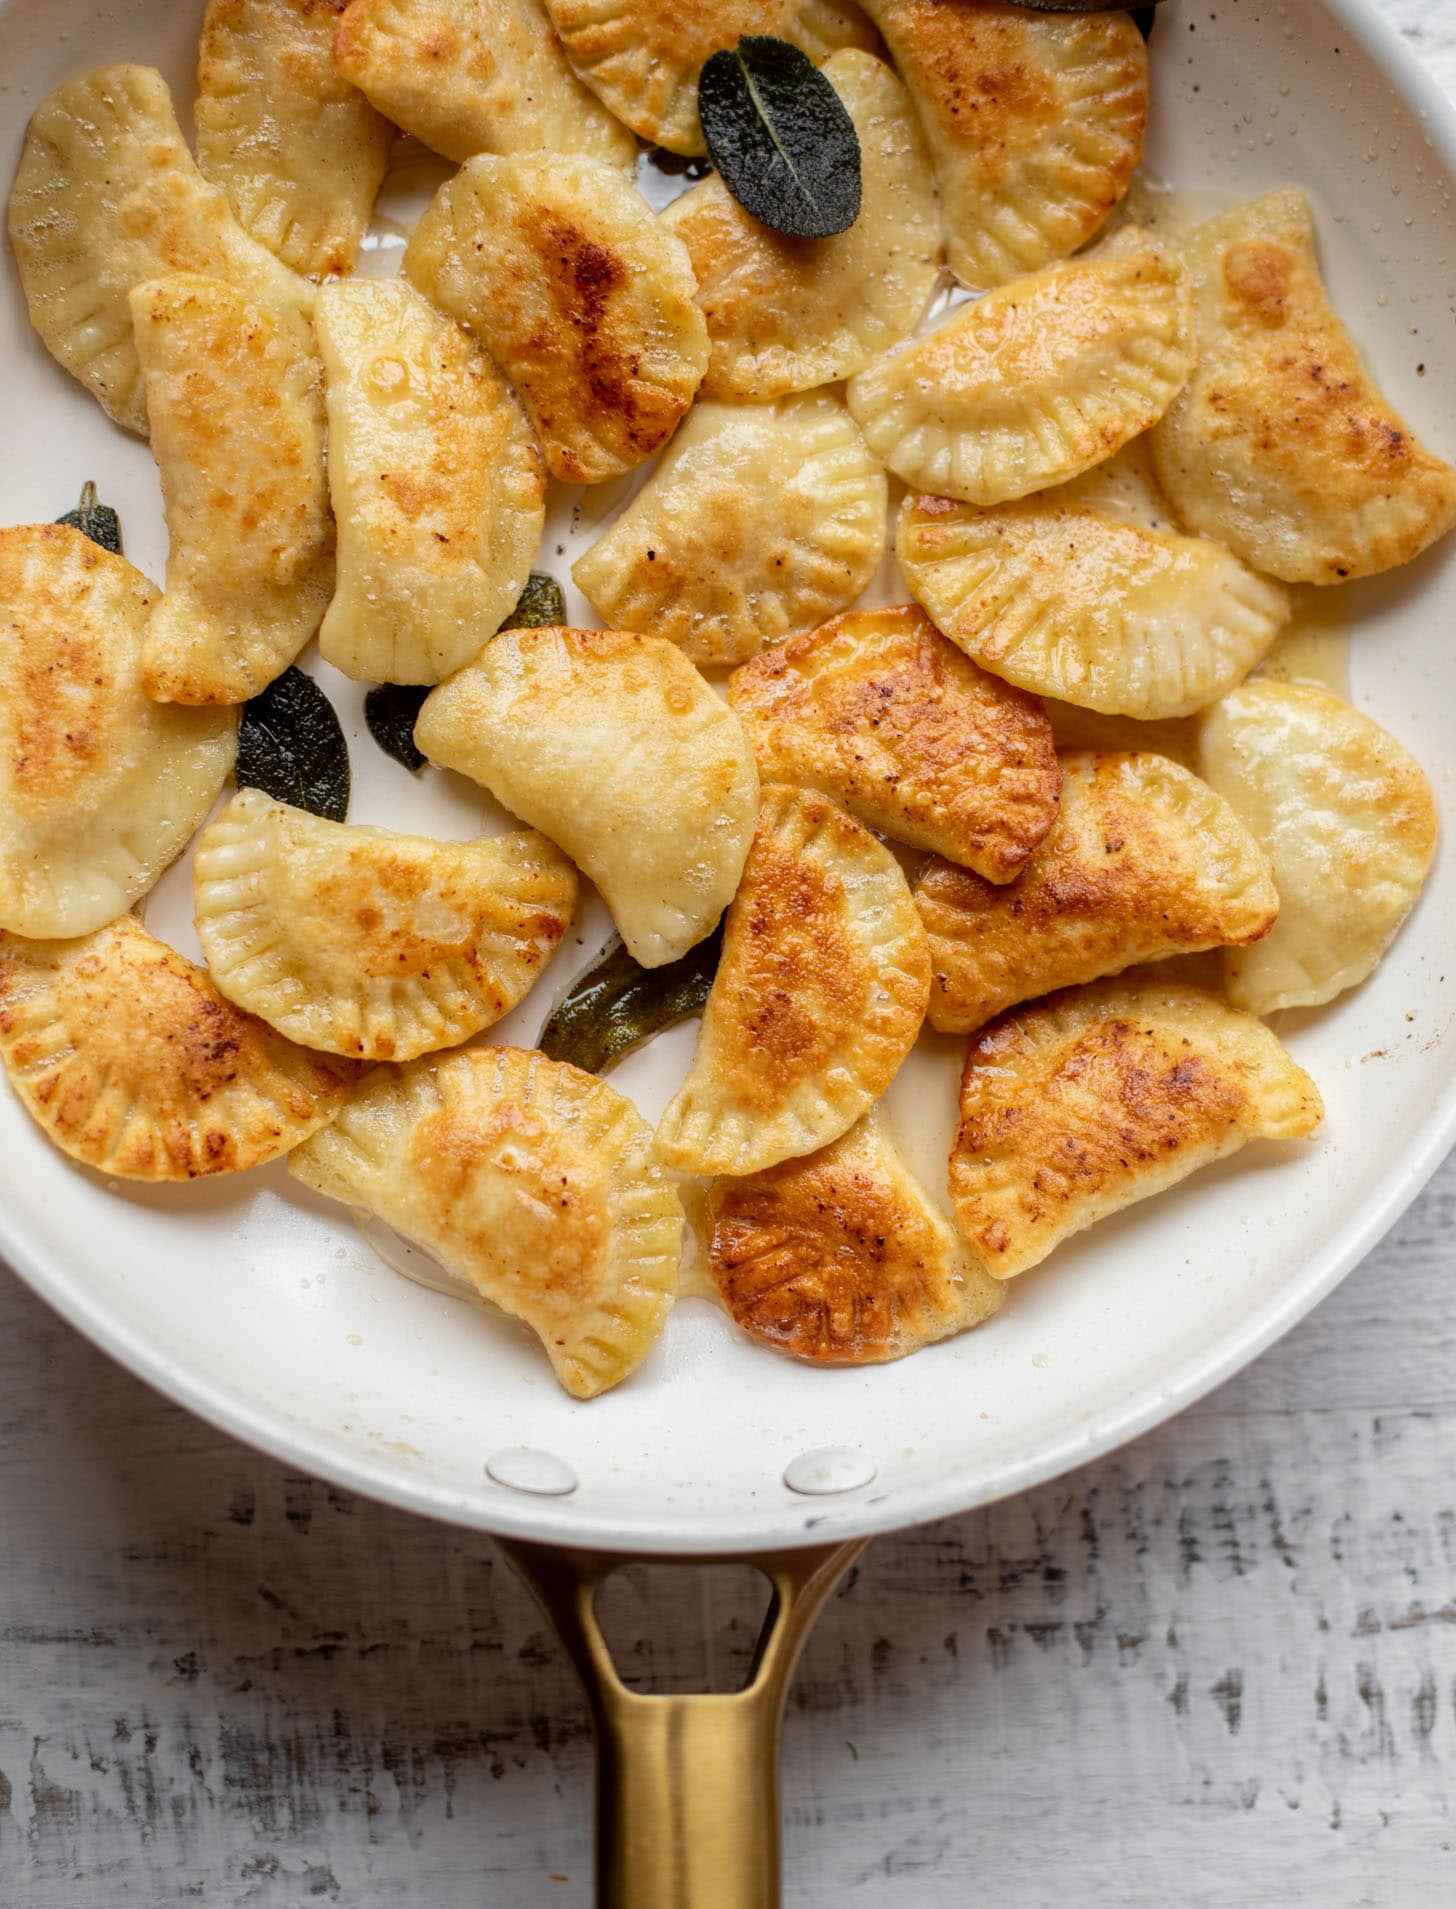
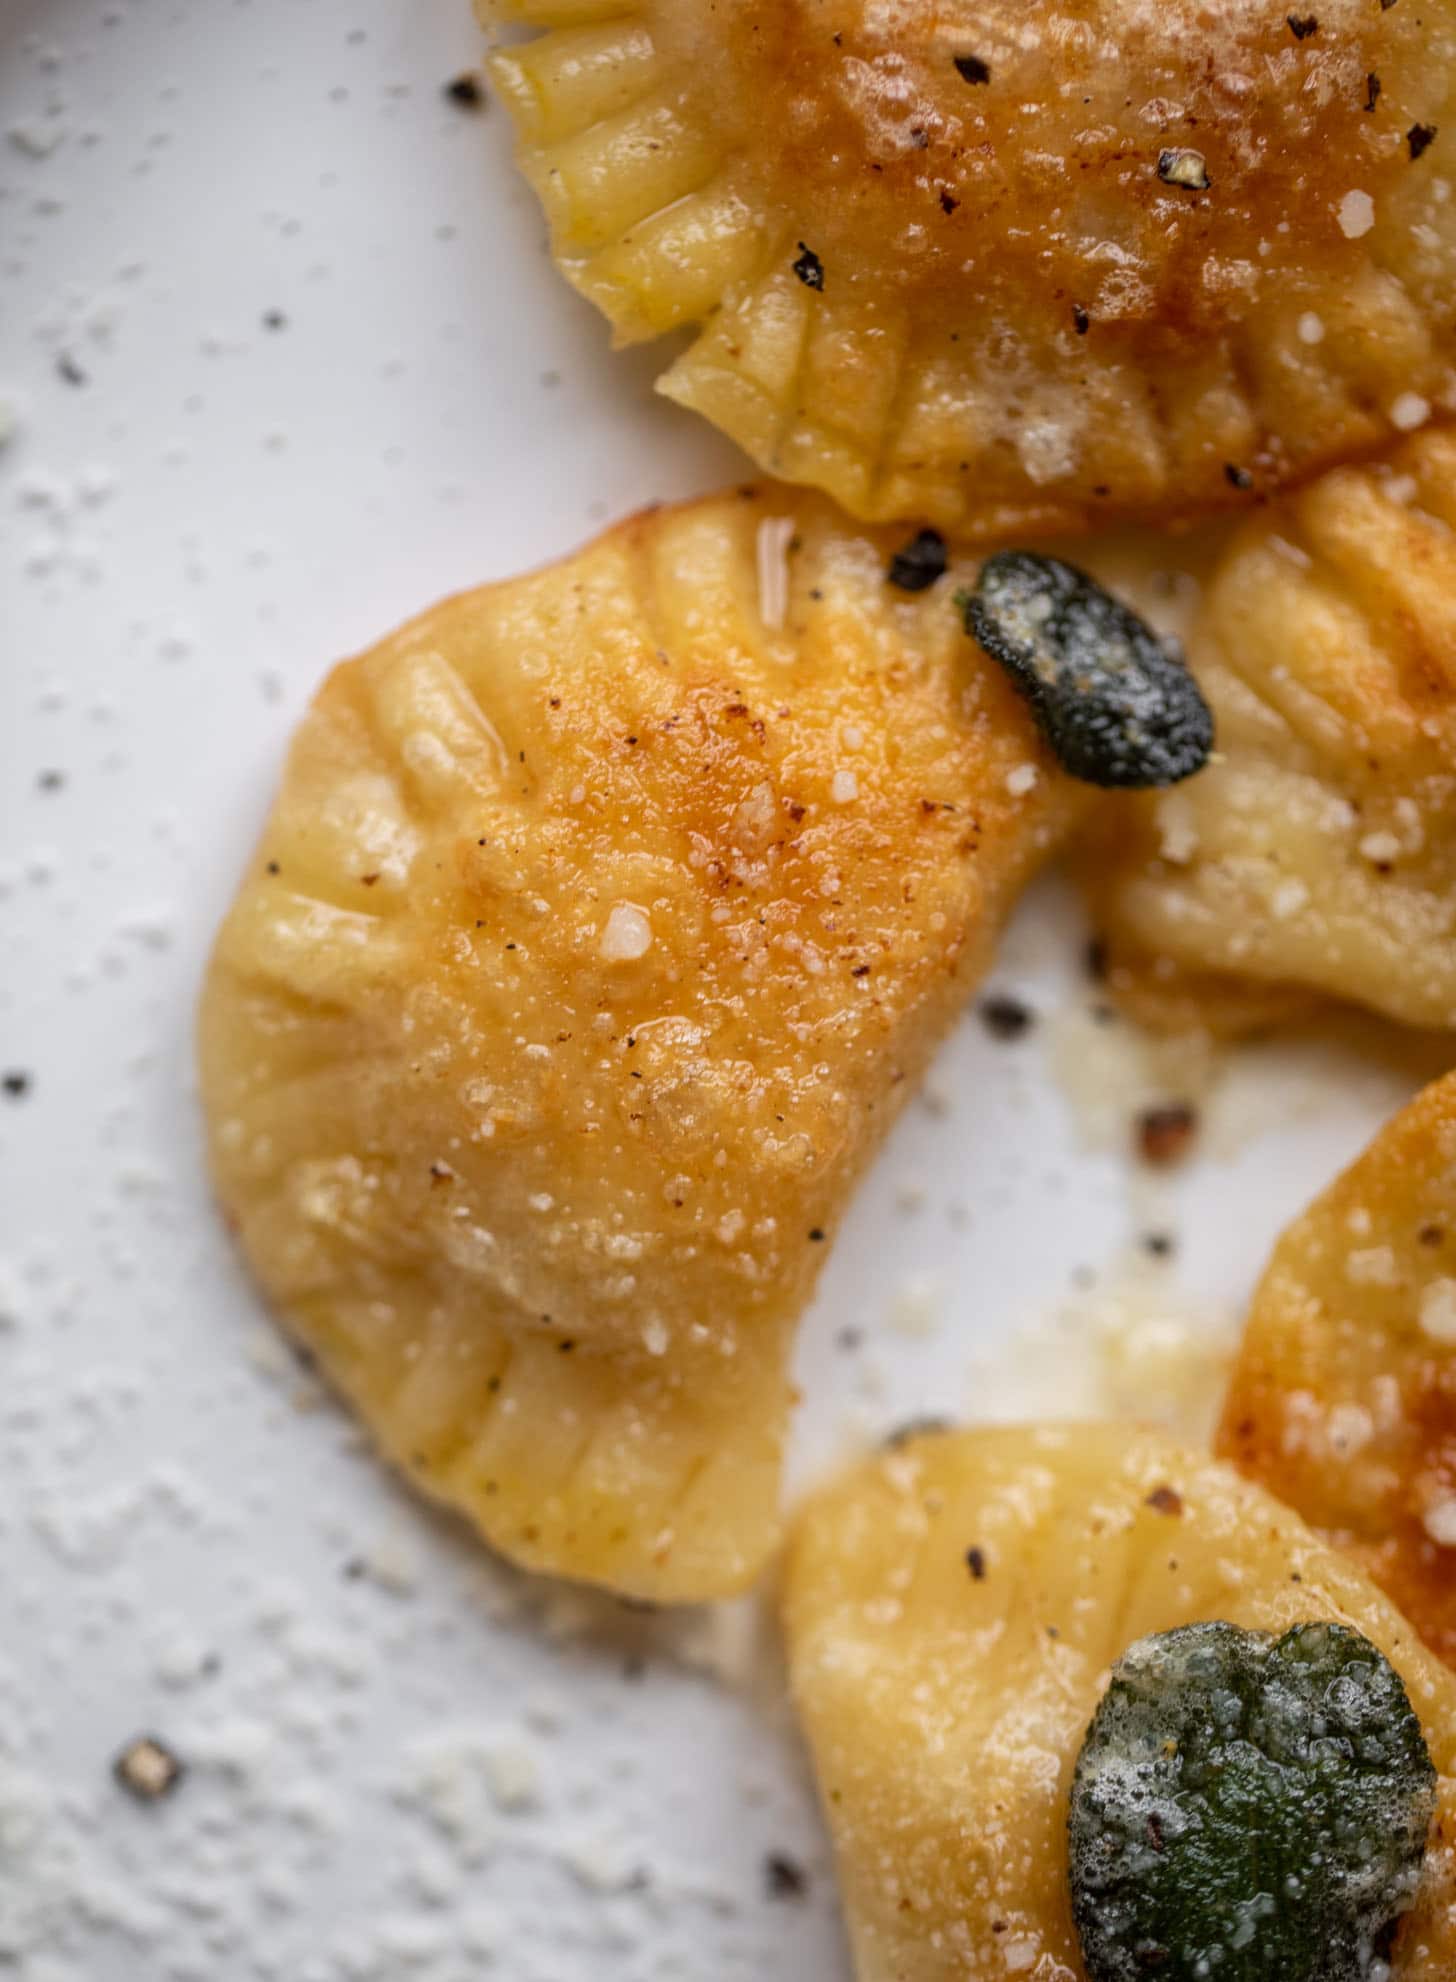
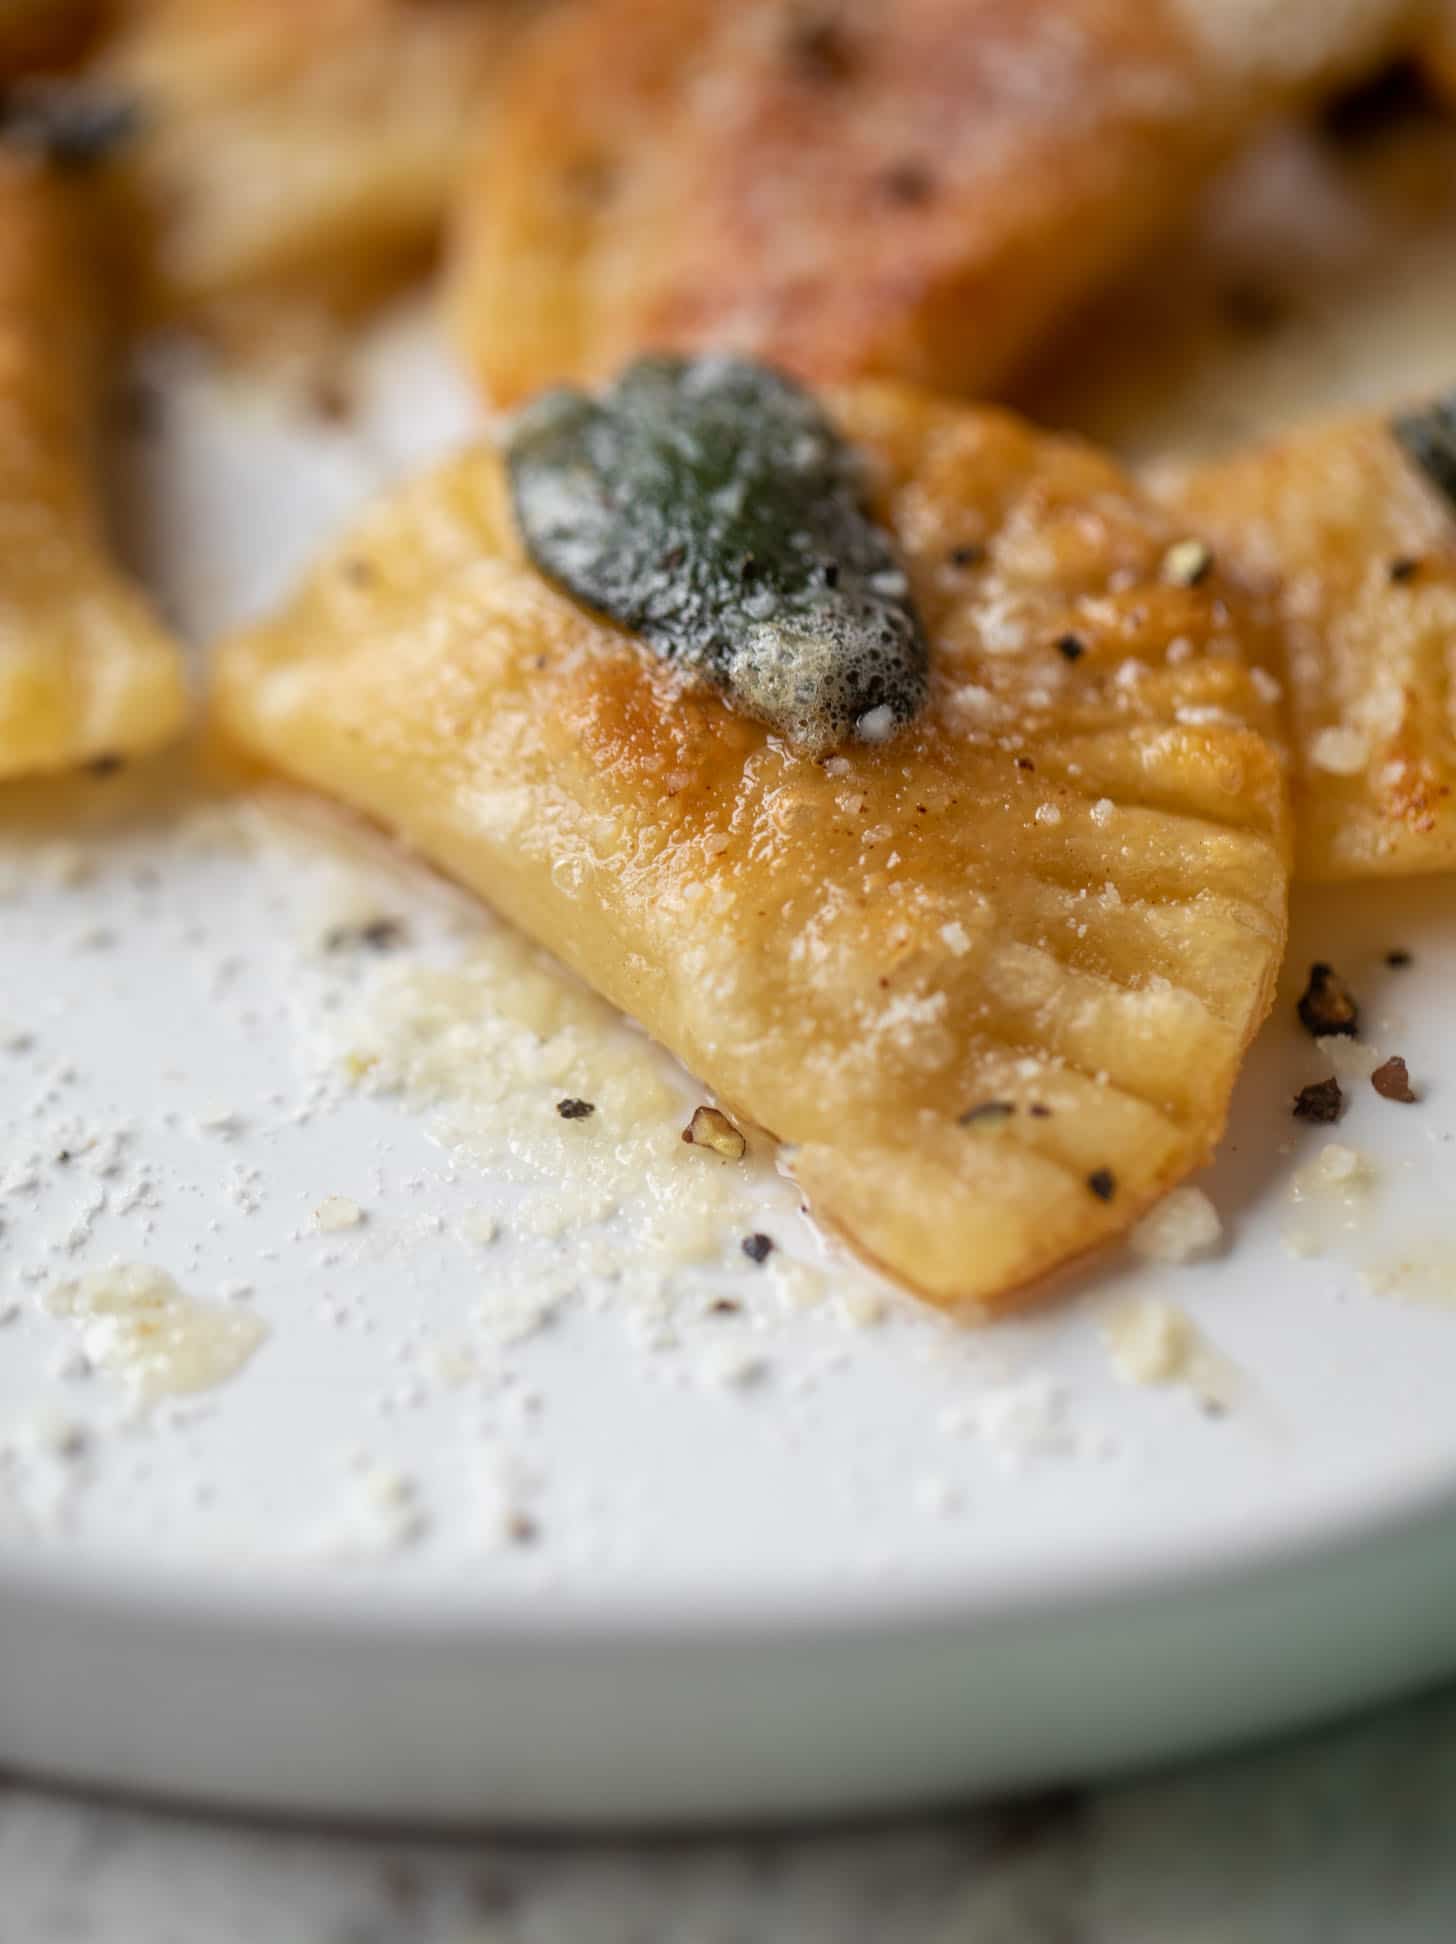
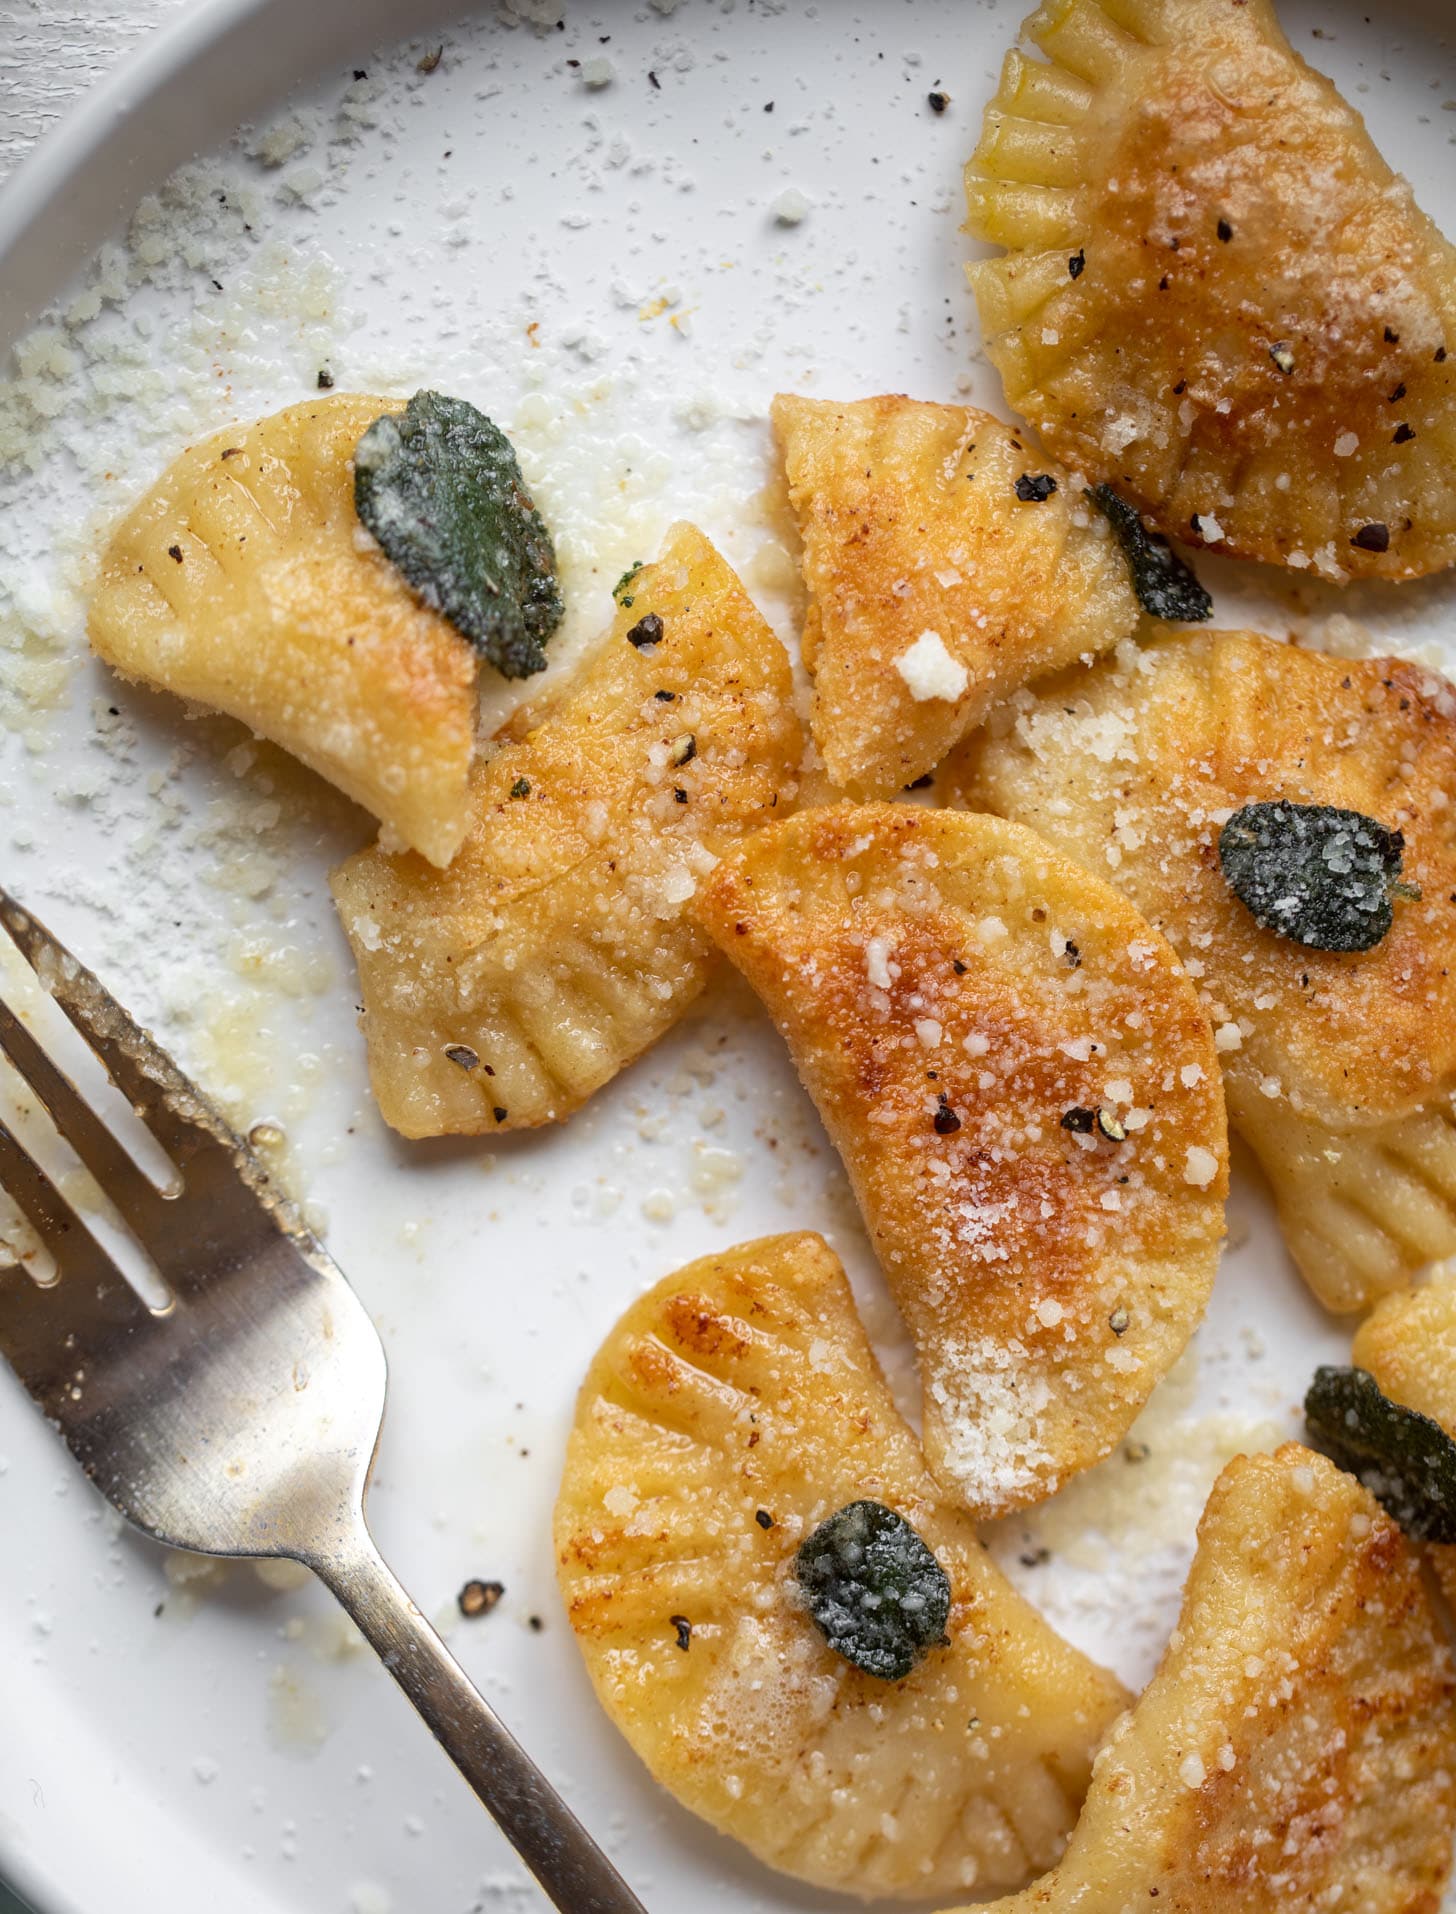
It’s simple and to the point. Obviously one of the reasons it’s incredible is because it is crisped and drizzle in brown butter. Plus more parmesan cheese. It goes without saying that any form of squash, brown butter, crispy sage and parmesan is one of the best flavor combos out there!
So one of my favorite things about these? You can prep them ahead of time and freeze them. YES!
Totally winning on that one.
These actually take less time than my sweet potato pierogi since we don’t have potatoes to roast. You basically blend up the filling and stuff the pasta. But that’s the tedious part – you do need to sit and fill the dough rounds, fold them over, crimp if you’d like and all that jazz.
I saw blast some music and get it done. It’s sort of relaxing. I love it.
And then when you’re done, you have pumpkin pierogies for days, stashed in the freezer. Stashed away for a long winter ahead that we are sort of all dreading but going to make the best of, right?
I mean, this is how we make the best of it. Trust me.
Pumpkin Pierogies

Pumpkin Pierogies
Ingredients
- 2 1/4 cups all-purpose flour
- 1 teaspoon salt
- 1 tablespoons unsalted butter, melted
- 1 cup plain greek yogurt or sour cream
- 1 large egg
- 1 large egg yolk
- 1 tablespoon canola or vegetable oil
- 2/3 cup pumpkin puree
- ⅓ cup freshly grated parmesan cheese, plus more for serving
- ⅓ cup ricotta cheese
- kosher salt and pepper
- ¼ teaspoon freshly grated nutmeg
- 6 tablespoons unsalted butter, for browning
- 1 handful fresh sage, about 12 to 15 leaves
- plain greek yogurt or sour cream (optional for serving)
Instructions
- In a large bowl, whisk together the flour and salt. In a small bowl, whisk together the butter, yogurt, egg, egg yolk and oil. Add the wet ingredients to the dry ingredients and stir until a dough forms. Let the dough rest for 10 to 20 minutes.
- In another bowl, whisk together the pumpkin, ricotta cheese, parmesan cheese, a big pinch of salt and pepper and the nutmeg. If desired, you can blend this in the food processor too!
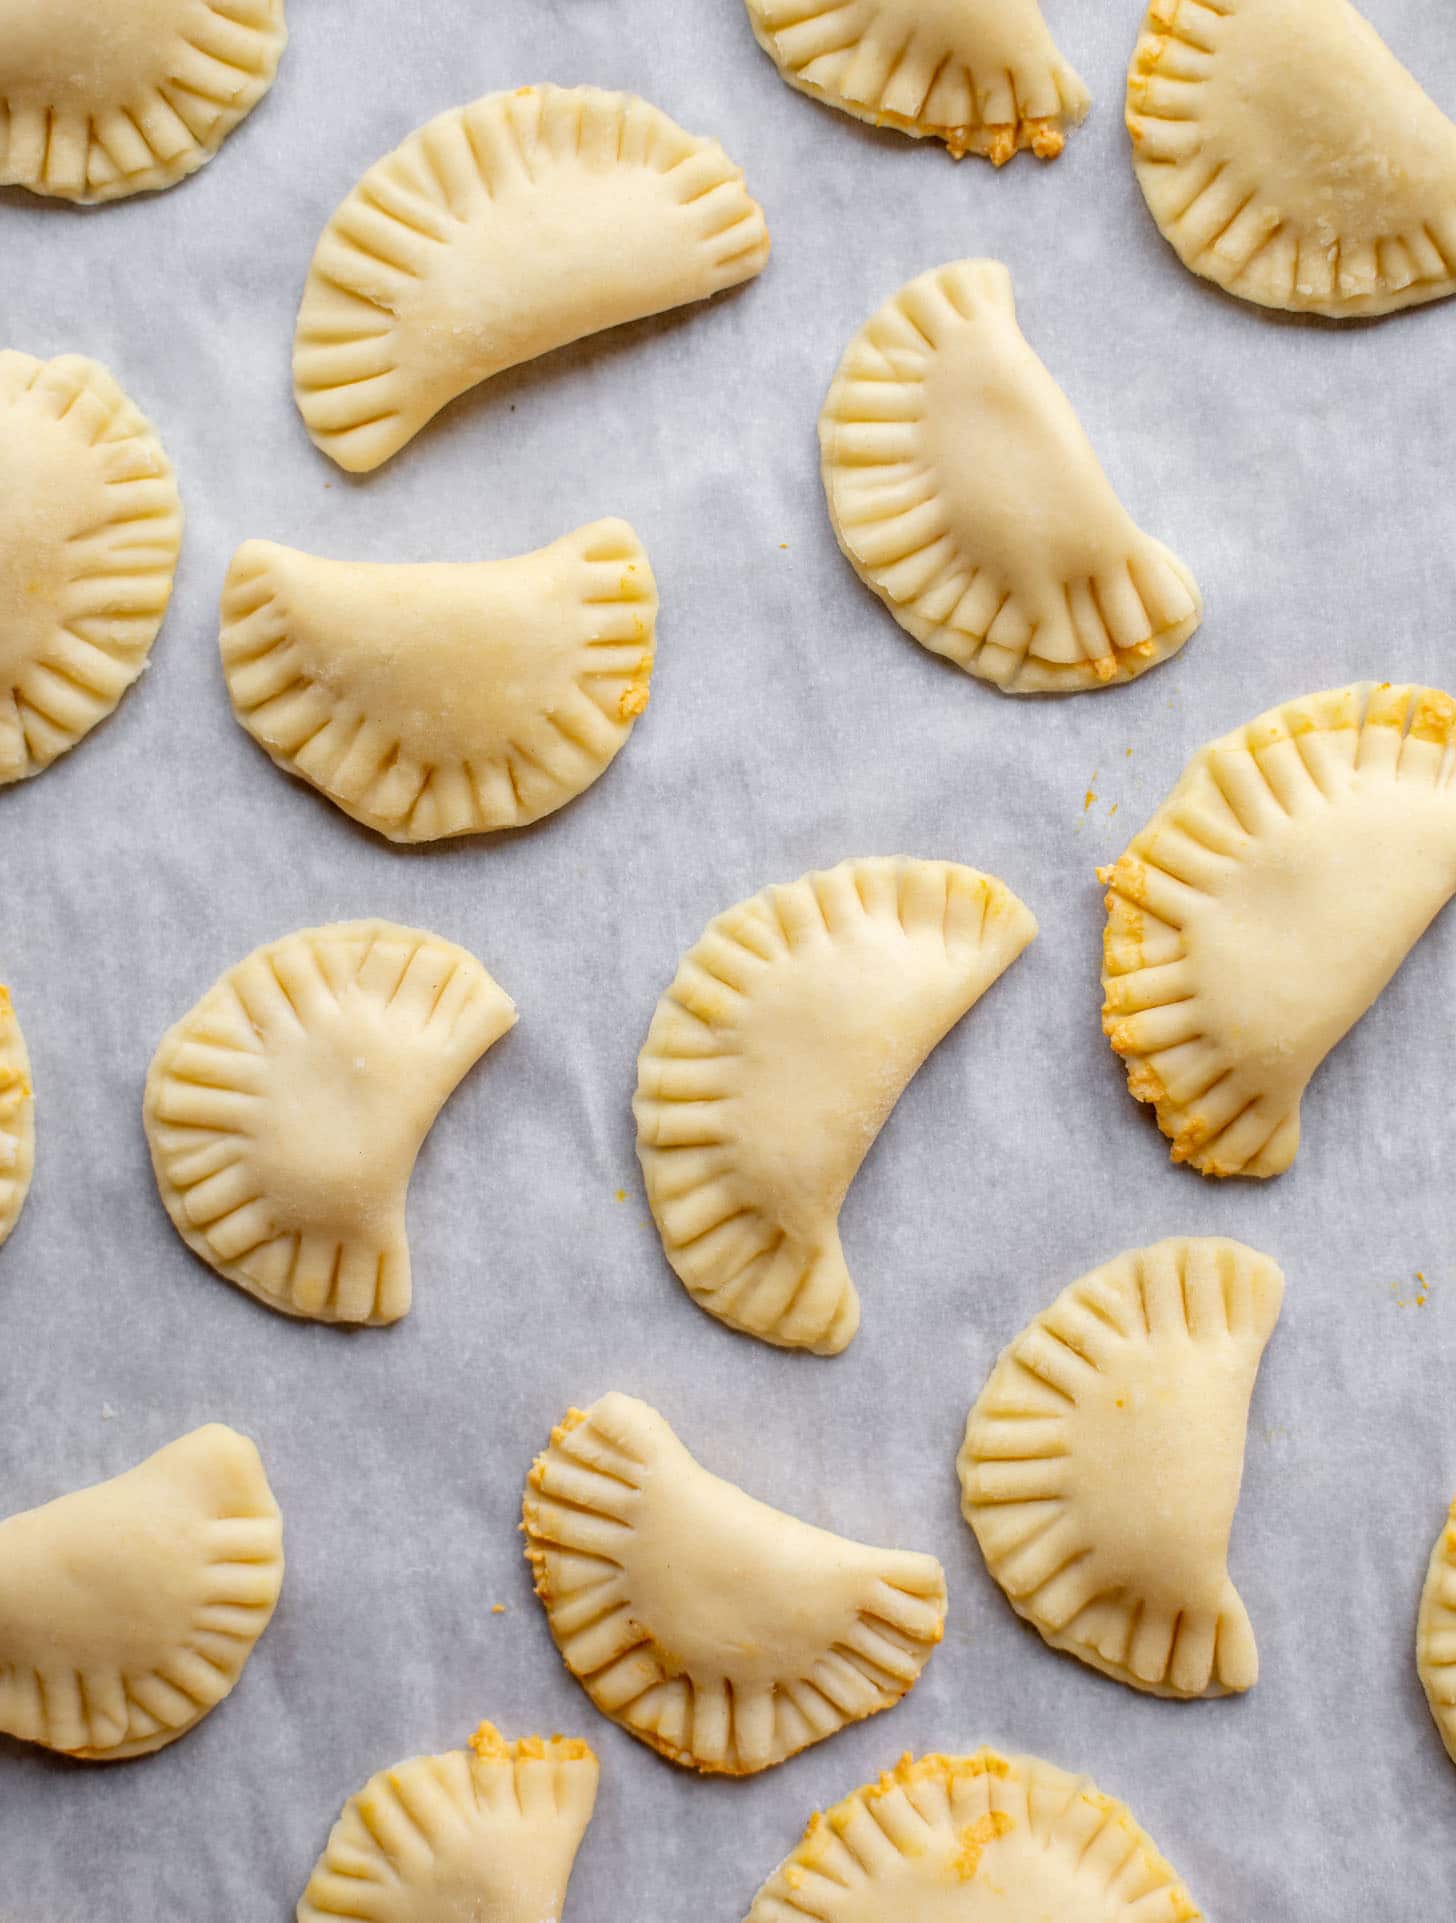
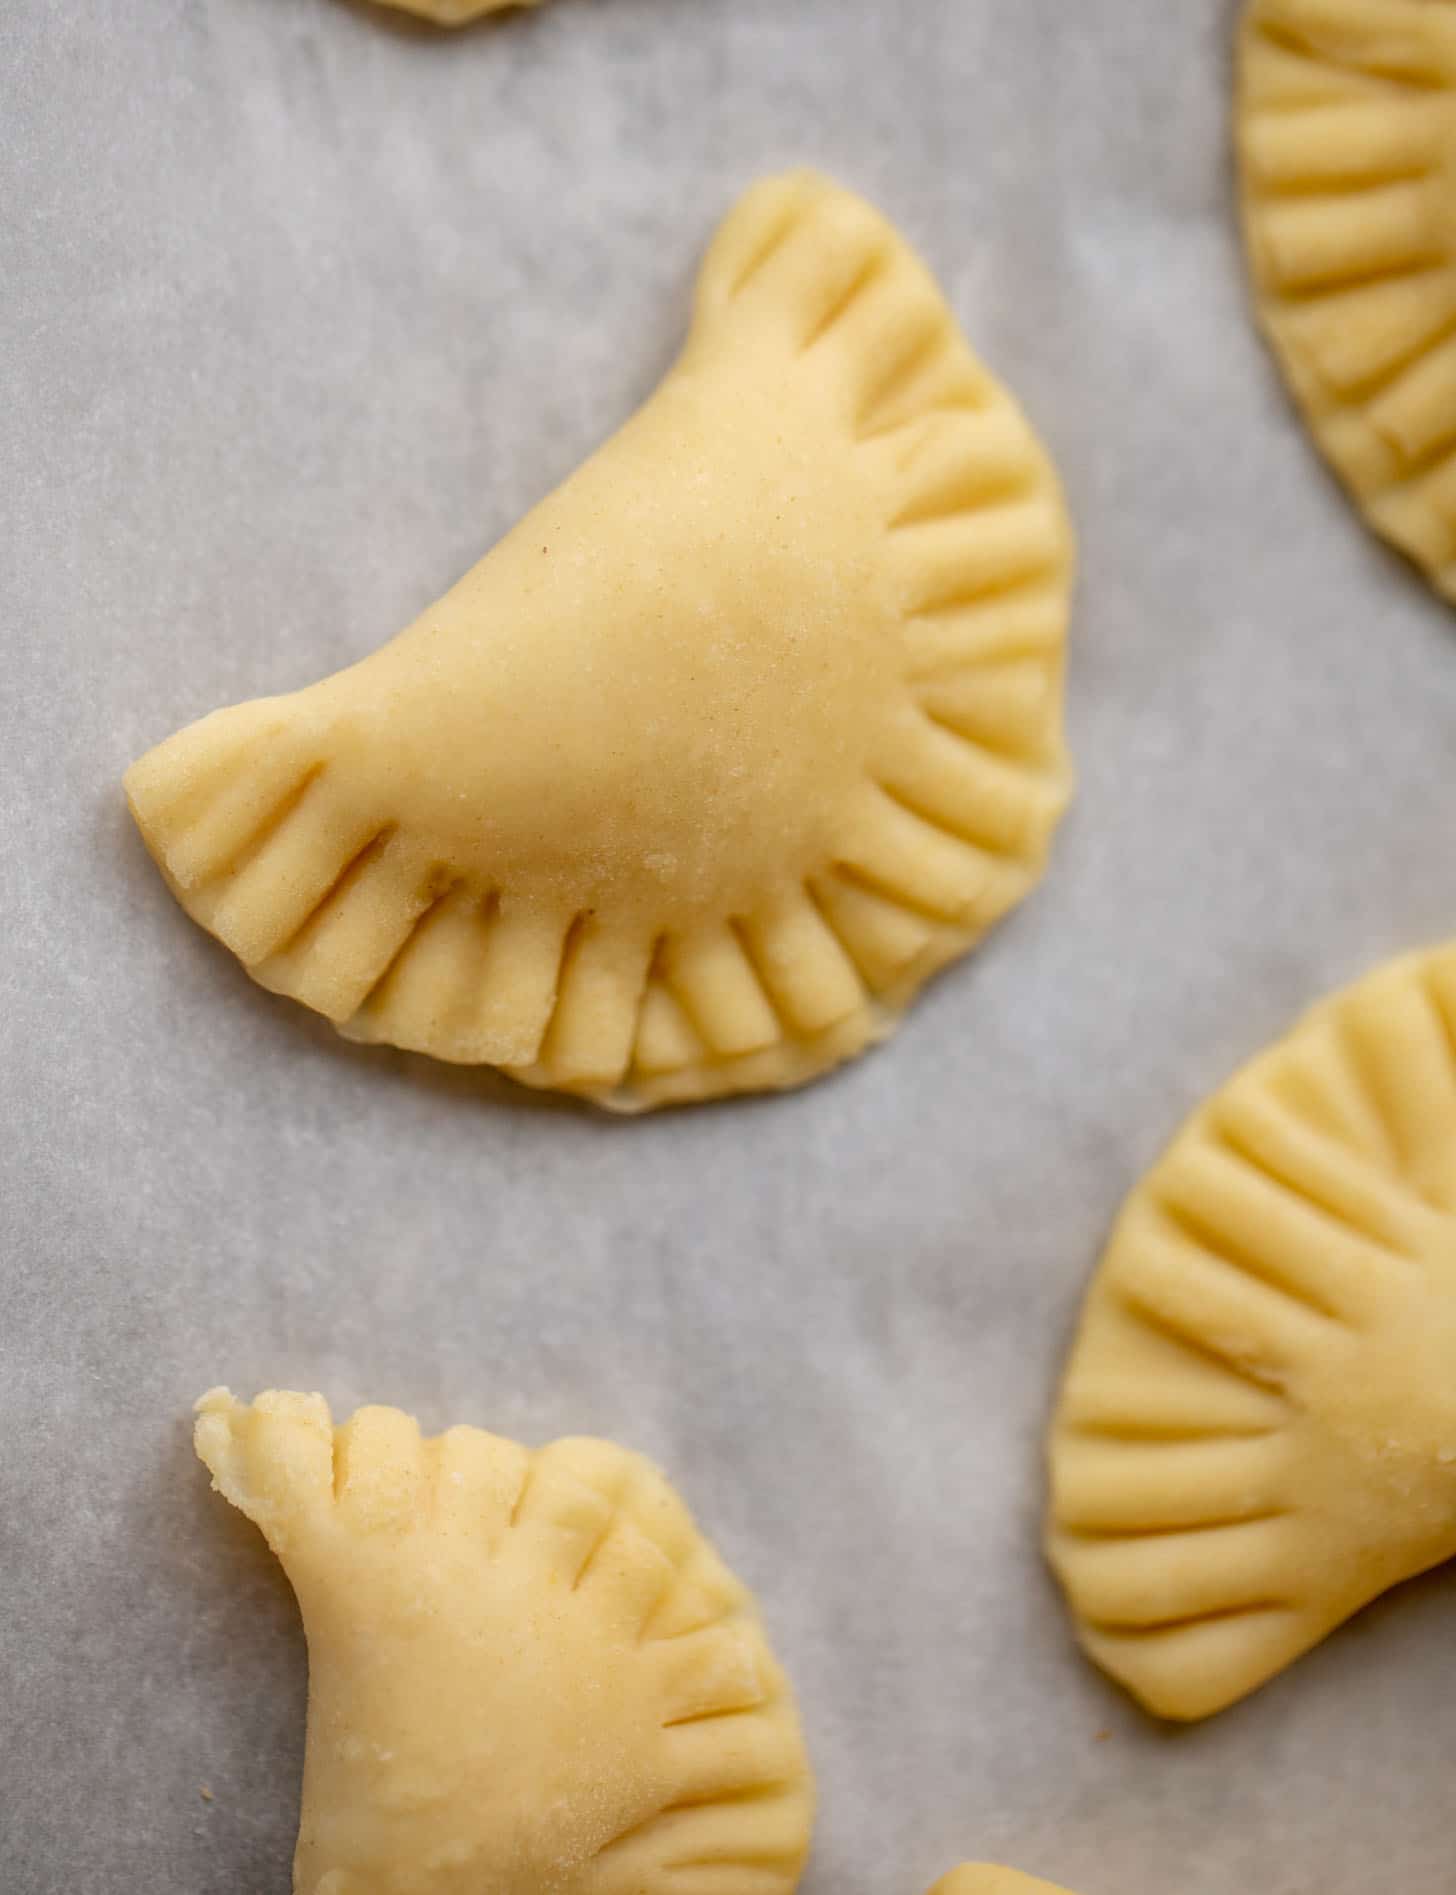
- Divide the pierogi dough in half. Roll one of the halves out until it’s very thin - about ⅛ of an inch. You don’t want the dough to tear, but you want it to be thin! Use a round cutter like a biscuit cutter or glass to cut rounds out from the dough. Place them on a sheet of parchment paper. Repeat with all the remaining dough, including the other half.
- Take about 1 to 2 teaspoons of filling and place it in the center of each dough round. Repeat with all dough rounds. Brush the edges of each piece of dough with water then fold it over and press it closed, creating the pierogi shape. If desired, you can use a fork to press the edges together.
- At this point you can freeze the pierogi or boil them.
- To freeze, place the pierogi on a baking sheet and freeze the sheet for 30 to 60 minutes. After that, remove the pierogies and place them in a resealable bag. They can be frozen for about 3 months!
- To cook right away or from the freezer, bring a pot of salted water to a boil. I cook about 5 to 6 pierogi at a time. Cook for 3 to 5 minutes, just until they float. Once they float, remove with a slotted spoon.
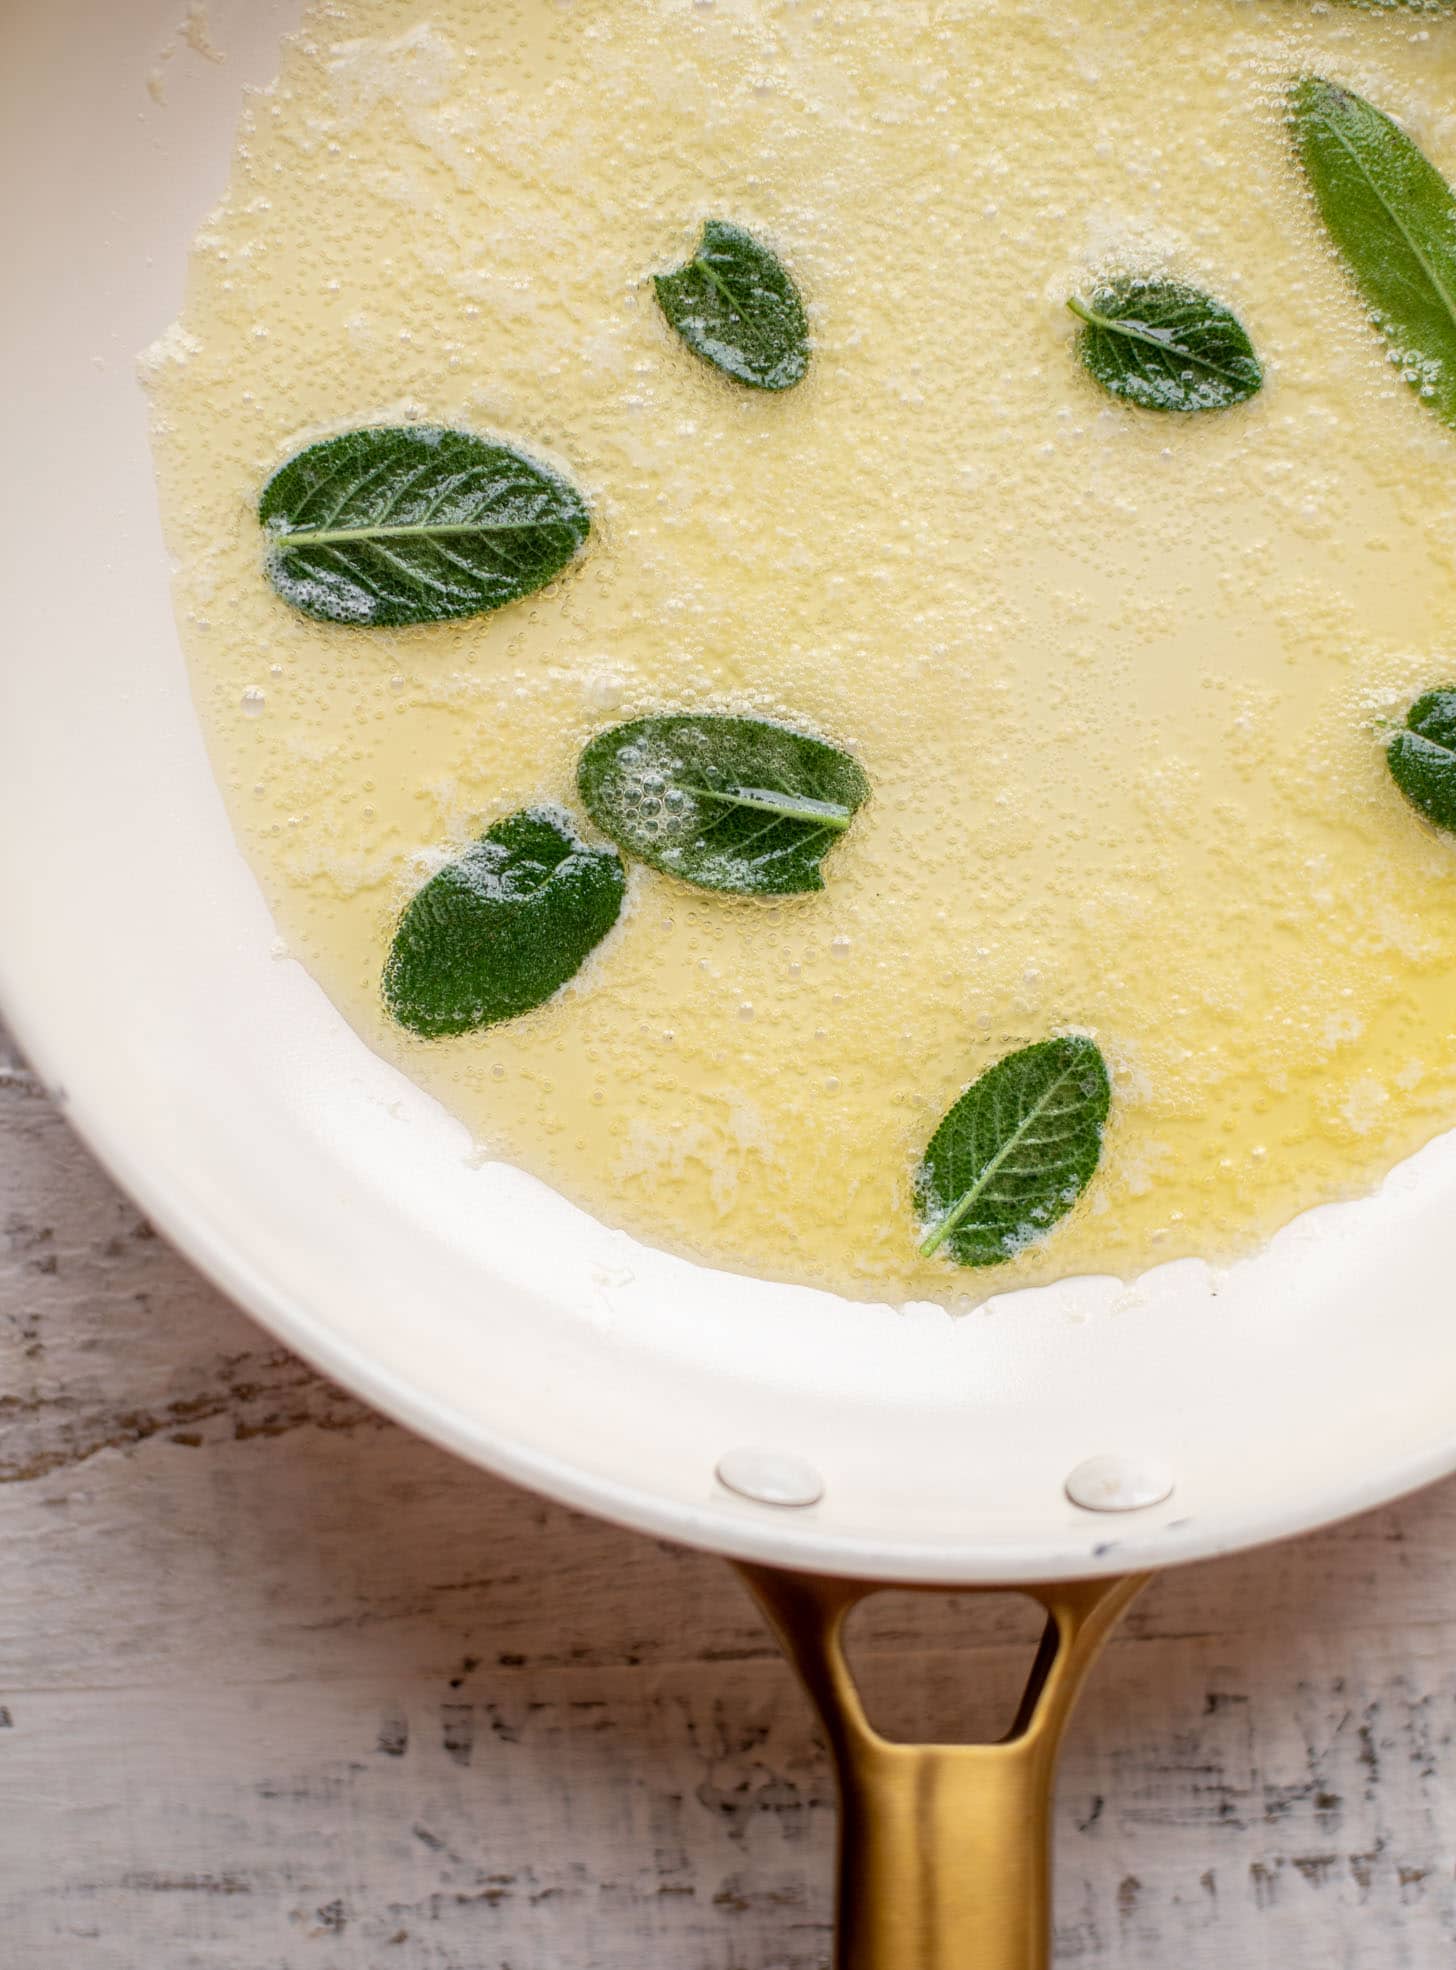
- To crisp the pierogi, heat a large skillet over medium heat and add the butter. Whisk and cook it for a few minutes until brown bits begin to appear, then toss in the sage. Add in the boiled pierogi in a single layer. Cook for 1 to 2 minutes per side, until golden and crisp. You may need to do this in batches. Serve immediately with the brown butter from the skillet and the crispy sage. Sprinkle with parmesan.
Did you make this recipe?
Be sure to follow @howsweeteats on instagram and tag #howsweeteats. You can also post a photo of your recipe to our facebook page.
I appreciate you so much!
Crispy, cheese, savory. My life!

7 Comments on “Pumpkin Pierogies with Brown Butter and Crispy Sage.”
These look delicious. Do you think they would work with GF flour?
i haven’t tried, but i do think they would work with an all-purpose GF flour!
Hits the spot, pumpkin, butter and sage. They sound amazing. We don’t have pumpkin in a can, would be alright to mash up from boiled pumpkin would be quite loose though should I thicken it up.
These were amazing!! I used honeynut squash instead of pumpkin because it’s what I had. Had them with a kale salad and a pumpkin beer and it was the perfect meal. I will definitely keep these in the rotation every fall/winter! Thanks!
a PERFECT combination!!!
Pingback: Sheet Pan Pierogies with Caramelized Onions and Chipotle Sour Cream. | bakkbenchersnetwork.com
I know this vibe so well from following How Sweet Eats for years. The pumpkin filling with brown butter and crispy sage is exactly the kind of cozy combo I end up craving on a random weeknight, and I had the same debate about pumpkin in the dough versus the filling when I tried something similar at home. Love how clearly everything is explained too, it honestly made the whole process feel way less intimidating, which I appreciate almost as much as assignment writing UAE help when life gets busy. Definitely saving this one for a weekend cooking session.