What To Eat This Week: 4/21/24.
I’m loving everything about our meals this week! What’s on your menu?! What To Eat This Week Skillet ricotta pasta with broccoli Crispy potato...
I’m loving everything about our meals this week! What’s on your menu?! What To Eat This Week Skillet ricotta pasta with broccoli Crispy potato...
Hello weekend! This week on the blog, I shared these crispy potato taco bowls. I also shared these roasted chickpeas with sweet peppers, a...
This Italian chopped salad is so easy and ridiculously satisfying. It’s super flavorful served over this grilled garlic bread, all toasty and golden and...
Sharing 30 favorite tacos and margaritas here! Lots of delicious tex-mex options with tons of delicious margaritas for the side! Tacos and margaritas coming...
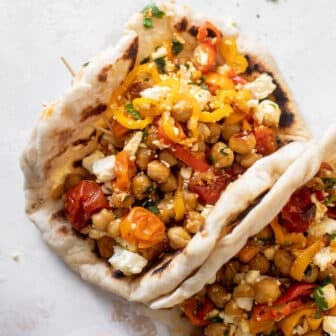
I love these roasted chickpeas with tomatoes and sweet peppers. They are savory, sweet and so delicious – super satisfying when served with pita,...
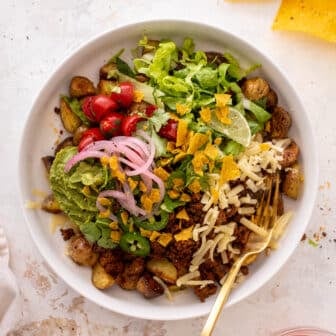
We love this crispy potato taco bowls for an easy dinner! Crunchy, roasted potatoes, ground turkey taco meat, cheese, guacamole, lettuce, tomato and all...
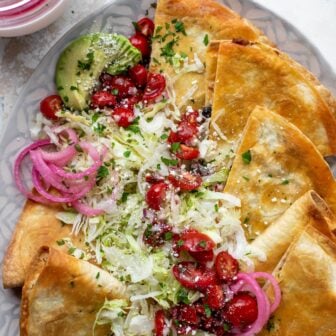
Your delish new menu is here! What’s on your menu this week?! What To Eat This Week Homemade spaghettios! Crispy baked quesadillas Pork milanese...
Hello weekend! This week on the blog I shared this charred cauliflower orzo. I also shared these sloppy joe stuffed peppers, a bunch of...
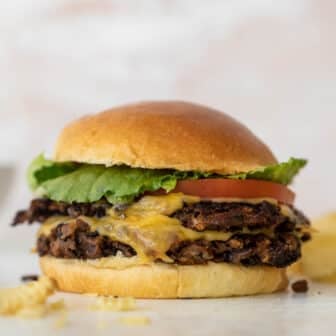
These black bean smashburgers are my favorite veggie burger! A simple, easy black bean mixture is smashed into a hot sizzling pan until super...
These are some of my favorite easy recipes for dinner! All of these are on my list of things to make when I don’t...
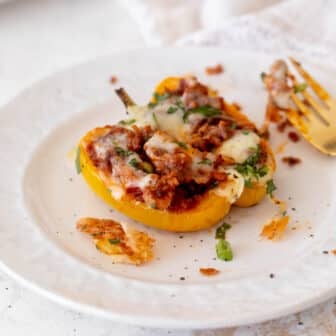
These sloppy joe stuffed peppers are a delicious and satisfying weeknight meal! My classic tangy and sweet sloppy joes are stuffed into roasted peppers...
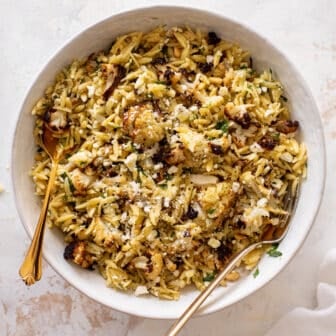
This cauliflower orzo is one of our favorite side dishes. Charred, roasted cauliflower, dilly lemon dressing and tender orzo are combined with feta cheese,...
©2024 How Sweet Eats. Design by Purr.